
Introduction #
This guide provides a step-by-step walkthrough for deploying the OpenLDAP directory service, and integrate it with Okta, using Docker and Docker Compose.
You will find also step by step instructions for install in a clean Ubuntu 24.04 LTS server, in case you don’t want (or can’t) use Docker.
We will cover everything from the initial server setup to populating the directory with data for a fictional company, “The Galaxy” (galaxy.universe), using management tools, and integrating with Okta using the LDAP Agent.
Navigation Guide #
This guide offers multiple setup approaches to match your needs:
- Containerized Deployment with Docker Compose (Recommended) - The fastest and easiest way to get started
- Manual Installation - Step-by-step native installation (based on Ubuntu 24.04 LTS) for learning and production
- Fully Automated One-click Installation Script - Automated native installation for quick deployment on Ubuntu 24.04 LTS
- Using Management Interfaces - Two different approach for manage the LDAP Server: a web interface and a Desktop Client
- Managing the Okta-LDAP Integration - Configure Okta integration after any setup method
When to use each approach:
- Docker Compose: Development, Demos, POCs
- Manual Install: Production environments, long-term deployments
- Automated Script: Quick development, Demos, POCs, when Docker is not an option
The LDIF Files #
We will define our entries using the LDAP Data Interchange Format (LDIF).
Once cloned the GitHub repository fabiograsso/okta-lab-ldap you will find the ready to use LDIF files in the ./src/ldifs-base/ folder. Additional files that will be used in the Okta-LDAP Integration are available in the ./src/ldifs/ folder.
Let’s take a look at our files:
-
root.ldif - Root Domain, create the root of our LDAP server (
dc=galaxy,dc=universe):dn: dc=galaxy,dc=universe objectClass: top objectClass: domain dc: galaxy -
ou.ldif - Organizational Units, which creates the top-level containers (OU - Organizational Units) for our users and groups:
dn: ou=People,dc=galaxy,dc=universe objectClass: organizationalUnit ou: People dn: ou=Groups,dc=galaxy,dc=universe objectClass: organizationalUnit ou: Groups -
users.ldif - Sample Users, which defines 12 users with various attributes, for example:
dn: uid=luke.skywalker@galaxy.local,ou=People,dc=galaxy,dc=universe objectClass: inetOrgPerson objectClass: organizationalPerson objectClass: person cn: Luke Skywalker givenName: Luke sn: Skywalker uid: luke.skywalker@galaxy.local mail: luke.skywalker@galaxy.local userPassword: {SSHA}P@ssword2024! title: Jedi Knight departmentNumber: JEDI-COUNCIL manager: uid=obiwan.kenobi@galaxy.local,ou=People,dc=galaxy,dc=universe o: Jedi postalAddress: Lars Moisture Farm, Anchorhead, Tatooine displayName: Luke Skywalker employeeNumber: 10021 -
groups.ldif - Sample Groups, which defines groups using the
groupOfUniqueNamesobject class, and theuniqueMemberattribute. Example:dn: cn=Droids,ou=Groups,dc=galaxy,dc=universe objectClass: top objectClass: groupOfUniqueNames cn: Droids description: Intelligent mechanical droid characters uniqueMember: uid=c-3po@galaxy.local,ou=People,dc=galaxy,dc=universe uniqueMember: uid=r2-d2@galaxy.local,ou=People,dc=galaxy,dc=universe -
photos.ldif - While it is not actually supported in Okta, we can load profile pictures in the LDAP Directory. It’s one of the most requested features in Okta Ideas, so the hope is that, sooner or later, Okta will support it, and our directory will be ready 😉 Photos are Base64 encoded JPEG files, and are defined in the
jpegPhotoattribute ofinetOrgPersonObject Class. For example:dn: uid=padme.amidala@galaxy.local,ou=People,dc=galaxy,dc=universe changetype: modify add: jpegPhoto jpegPhoto:: /9j/4AAQSkZJRgABAQAAAQABAAD/2wBDAAYEBQYFBAY[...]
The following table summarizes the users who will be loaded in our example:
| UserID (@galaxy.local) | Full Name | Organization | Groups |
|---|---|---|---|
| luke.skywalker | Luke Skywalker | Jedi | Light-Side, Rebel-Alliance, Jedi-Council, Pilots |
| leia.organa | Leia Organa | Resistance | Light-Side, Rebel-Alliance |
| han.solo | Han Solo | Resistance | Light-Side, Rebel-Alliance, Pilots |
| obiwan.kenobi | Obi-Wan Kenobi | Jedi | Light-Side, Rebel-Alliance, Jedi-Council |
| yoda | Yoda | Jedi | Light-Side, Jedi-Council |
| chewbacca | Chewbacca | Resistance | Light-Side, Rebel-Alliance |
| padme.amidala | Padmé Amidala | Resistance | Light-Side, Naboo-Delegation |
| lando.calrissian | Lando Calrissian | Resistance | Light-Side, Rebel-Alliance |
| qui-gon.jinn | Qui-Gon Jinn | Jedi | Light-Side, Jedi-Council |
| mace.windu | Mace Windu | Jedi | Light-Side, Jedi-Council |
| darth.vader | Darth Vader | Empire | Dark-Side, Galactic-Empire, Pilots |
| darth.sidious | Darth Sidious | Empire | Dark-Side, Galactic-Empire |
| wilhuff.tarkin | Wilhuff Tarkin | Empire | Dark-Side, Galactic-Empire |
| c-3po | C-3PO | Droid | Light-Side, Droids, Rebel-Alliance |
| r2-d2 | R2-D2 | Droid | Light-Side, Droids, Rebel-Alliance |
All users are configured with the fake email domain @galaxy.local.
You can easily replace it with a custom domain using:
#!/bin/bash

DOMAIN="custom-domain.com"
find ./src/ldifs-base ./src/ldifs -type f -name "*.ldif" | \
while read file; do
  sed -i '' -E "s/^(mail: )([a-zA-Z0-9._-]+)@galaxy\.local/\1\2@${DOMAIN}/g" "$file"
done
Or, for example, if you have a Gmail account you can leverage on the feature of Gmail that permit to have multiple aliases, by adding a +alias after your name:
#!/bin/bash

GMAIL_USER="your.name"
GMAIL_DOMAIN="gmail.com"
find ./src/ldifs-base ./src/ldifs -type f -name "*.ldif" | \
while read file; do
  sed -i '' -E "s/^(mail: )([a-zA-Z0-9._-]+)@galaxy\.local/\1${GMAIL_USER}+\2@${GMAIL_DOMAIN}/g" "$file"
done
TCP Ports #
This guide uses ports 1389 (LDAP) and 1636 (LDAPS) instead of the standard 389/636 for several reasons:
- Non-privileged access: Ports below 1024 require root privileges to bind. Using higher ports allows the Docker containers to run with reduced privileges, improving security.
- Avoid conflicts: If your system already has an LDAP service or Active Directory domain controller running, it would be using the standard ports. The alternate ports prevent conflicts.
- Development flexibility: In development environments, you can run multiple LDAP instances simultaneously on the same host using different port ranges.
- Security through obscurity: While not a primary security measure, using non-standard ports can reduce automated scanning attempts in exposed environments.
If you need to use standard ports, you can modify the port mappings in docker-compose.yml, or in the file /etc/default/slapd.
The Okta LDAP Agent #
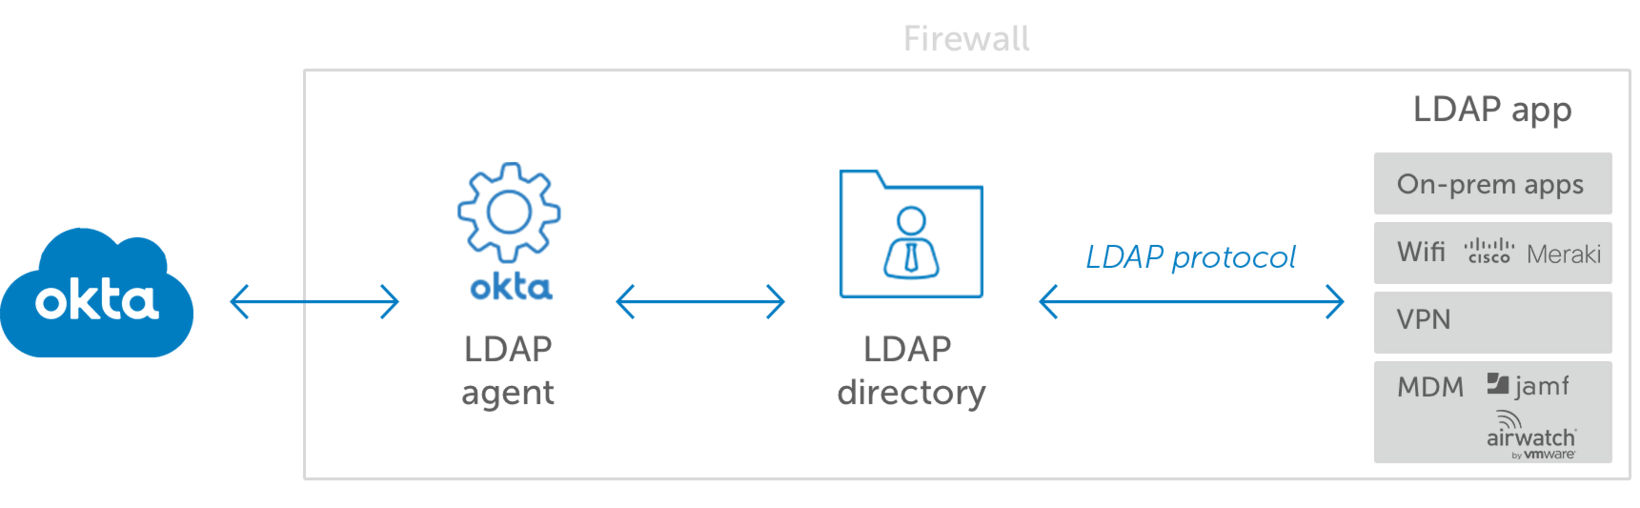
The Okta LDAP Agent is a lightweight software component that acts as a secure bridge between your on-premises LDAP directory and Okta’s cloud-based identity platform. It enables organizations to integrate existing LDAP directories (such as OpenLDAP, Oracle Directory Server, or IBM Security Directory Server) with Okta without requiring direct network connectivity or exposing LDAP ports to the internet.
Key capabilities:
- Delegated Authentication: Allows users to authenticate against your LDAP directory while accessing Okta-protected applications, maintaining your existing password policies and authentication logic
- User Provisioning: Synchronizes user profiles and groups from LDAP to Okta, or vice versa, based on your configuration
- Password Management: Supports password changes and resets initiated from Okta, propagating them back to your LDAP directory
- Secure Communication: Establishes an outbound HTTPS connection from your network to Okta, eliminating the need for inbound firewall rules
- High Availability: Supports multiple agents for redundancy and load balancing
- Automatic Updates: Agents can update themselves automatically when multiple instances are deployed
The agent runs as a service on Windows or Linux servers within your network, polling your LDAP directory at regular intervals and communicating changes to Okta via secure REST API calls.
Containerized Deployment with Docker Compose #
Docker is the ideal solution for a fast, reproducible, portable, and isolated setup. This section provides a complete docker-compose.yml configuration to deploy the entire stack.
Okta does not officially support (yet) Docker for executing the LDAP Agent. While it’s a fantastic way to quickly set up a full environment, I don’t suggest using it in production. In that case you can follow the Manual Installation.
On the other hand, Docker is the best solution for demoes, POCs, quick test.
Prerequisites #
- Docker and Docker Compose are installed.
- If you are using a Ubuntu 24.04 Linux server:
apt-get install -y docker docker-compose - In a macOS or Windows environment, you can install Docker Desktop
- If you are using a Ubuntu 24.04 Linux server:
- Git clone the following repository:
git clone https://github.com/fabiograsso/okta-lab-ldap/ cd okta-lab-ldap - Download the
.debfile of the Okta LDAP Agent and copy it into the./docker/okta-ldap-agent/packagefolder.- Log in to your Okta Admin Console.
- Navigate to Directory → Directory Integrations.
- Click Add Directory → Add LDAP Directory.
- Follow the setup steps. On the “Install Agent” step, right-click the Download Agent button and copy the link.
- Download the
.debfile on your LDAP server:curl -o ./docker/okta-ldap-agent/package/OktaLDAPAgent.deb \ https://xxx.okta.com/artifacts/JAVA_LDAP/05.24.00/OktaLDAPAgent-05.24.00-27823a892f7b.x86_64.deb
- Alternatively, populate the
DEB_URLenvironment variable with the download URL
Configuration File #
The .env file contains all the configuration. You can customize it, or you can keep the default value and change only the OKTA_ORG value to your Okta tenant name.
OKTA_ORG=myorg.okta.com
LDAP_ORGANISATION=The Galaxy
LDAP_DOMAIN=galaxy.universe
LDAP_BASE_DN=dc=galaxy,dc=universe
LDAP_ADMIN_PASSWORD=adminpassword
LDAP_CONFIG_PASSWORD=configpassword
The src/ldifs-base folder contains the LDIF files for OU, Users, and Groups. It will load the sample data described before.
If you change LDAP_DOMAIN and LDAP_BASE_DN, remeber to change all the LDIF files in order to reflect the new values. The LDIF files are static and will be not changed automatically.
If you don’t have experience with LDIF files, I warmly suggest to use the default value.
Remember: LDAP_BASE_DN must be derived from LDAP_DOMAIN. Example: LDAP_DOMAIN=galaxy.universe → LDAP_BASE_DN=dc=galaxy,dc=universe
Execution #
There is a Makefile that contains some shortcuts in order to make it easier to execute the needed Docker Compose commands.
Before starting, double-check again to:
- Have downloaded the Okta LDAP Agent deb file in the folder
./docker/okta-ldap-agent/package/(or populated theDEB_URLenvironment variable with the download URL) - Have edited the
.envfile and customized theOKTA_ORG,LDAP_ADMIN_PASSWORD, andLDAP_CONFIG_PASSWORDvariables
-
Build the Stack
Since there is a custom image used for the Okta LDAP agent, the first step is to build it. From the
okta-lab-ldaproot directory, run:make build -
Start the Stack
make start -
Configure the Okta Agent
This is a one-time manual step. You don’t need to run it again when you restart the service.
make configureFollow the prompts:
- Okta Subdomain: Enter your Okta org URL (e.g.,
https://myorg.okta.com). - Proxy Server: Press Enter to skip.
- LDAP Server:
ldaps://openldap:1636 - LDAP Admin DN for Agent: For testing, you can use the main admin account:
cn=admin,dc=galaxy,dc=universe. For production, see the considerations in the Appendix. - LDAP Admin Password: Enter the password for the account above.
- Register Agent in Okta:
- You will see a prompt like this:
To continue, navigate to the following website: [https://xxx.okta.com/activate] and enter the following code: [MSJPKGRP] - Follow the instructions and open the
/activateURL in your Okta tenant - Enter the Activation code
- Click on “Allow”
- You will see a prompt like this:
You can ignore the final error:
/opt/Okta/OktaLDAPAgent/scripts/configure_agent.sh: line 302: systemctl: command not found- This is due to the fact that the Docker image doesn’t support systemctl. The startup of the agent will be in any case handled by the docker image script. - Okta Subdomain: Enter your Okta org URL (e.g.,
Access the Services:
- LDAP: Available on
localhost:1389,localhost:1636. - ldap-ui: Available at
http://localhost:5000
If you are running it on Docker Desktop, the easiest way is to open a browser and use the localhost URL.
If your Docker is remote, use the following command to open an SSH tunnel and get access to the LDAP, LDAPS, and ldap-ui ports. This will avoid opening the ports on the firewall, and it’s a more secure way to connect your server:
ssh -f -N -L 1389:localhost:1389 ubuntu@myserverIP
ssh -f -N -L 1636:localhost:1636 ubuntu@myserverIP
ssh -f -N -L 5000:localhost:5000 ubuntu@myserverIP 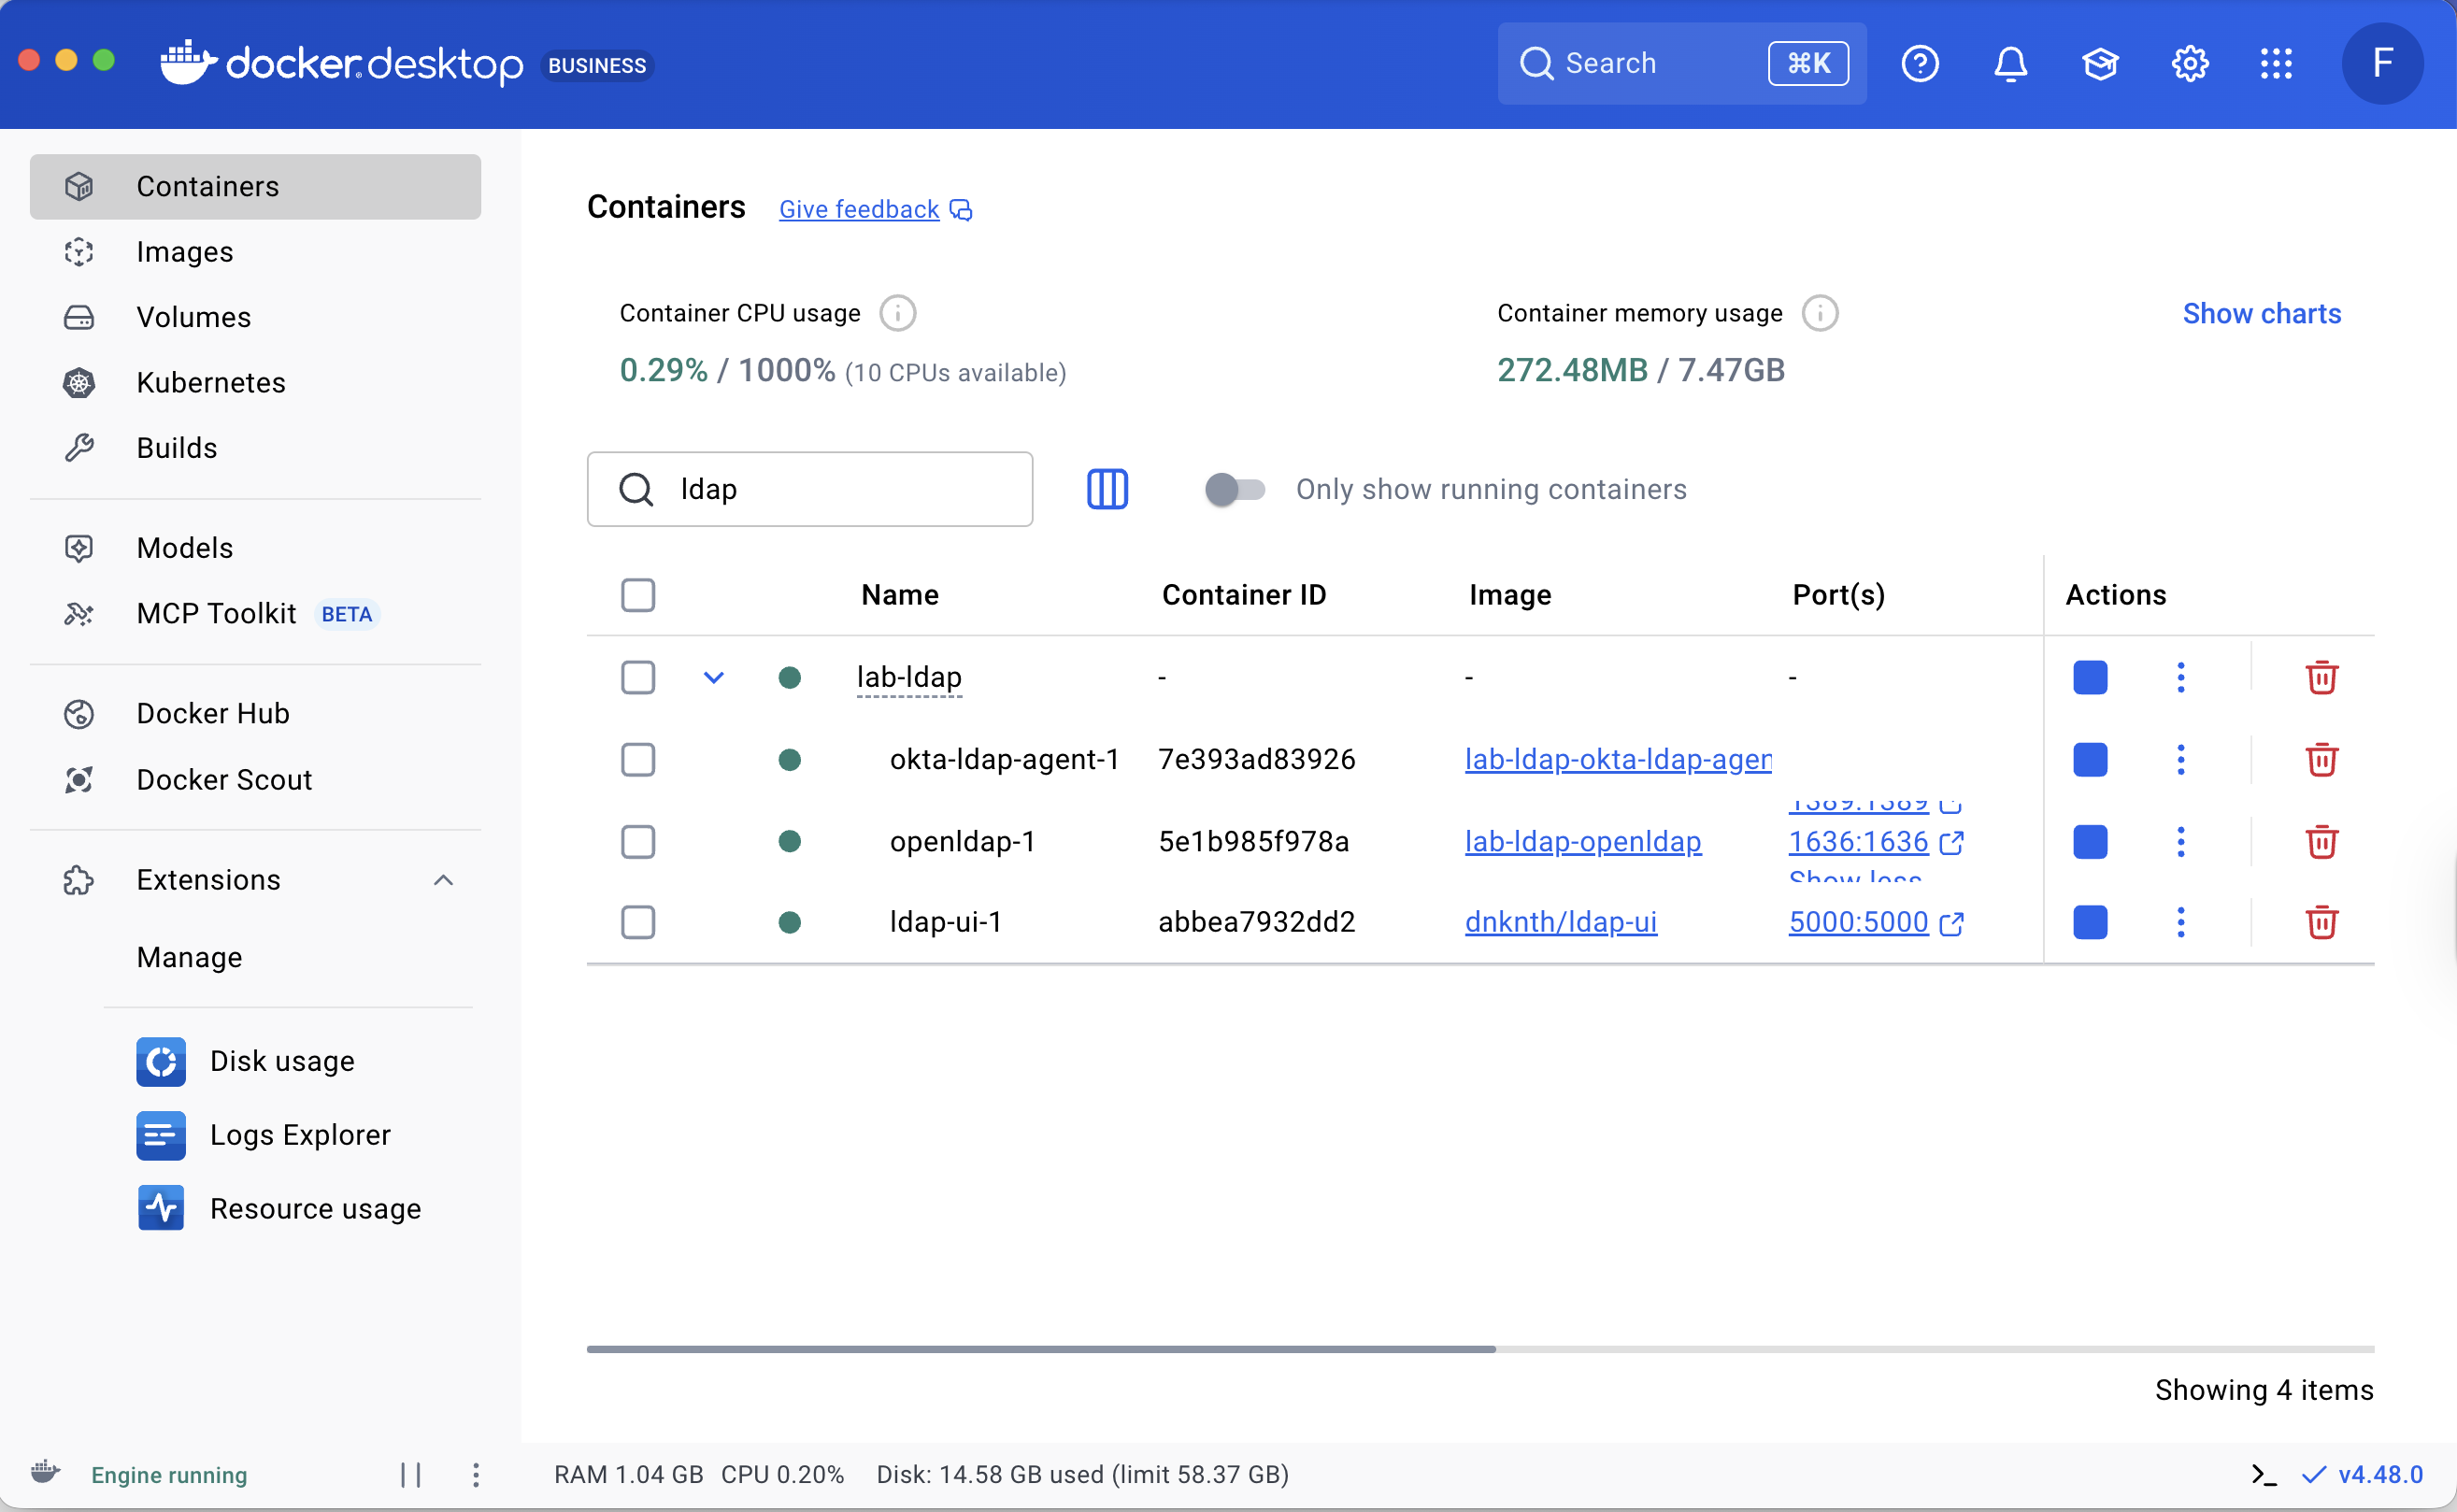
Other commands #
Other Makefile commands:
| Command | Description |
|---|---|
make stop |
Stop Docker-Compose |
make restart |
Restart docker-compose |
make logs |
Show the last 500 logs and start tail -f |
make start |
Start Docker-Compose (in the background) |
make start-logs |
Start Docker-Compose with logs |
make restart-logs |
Restart Docker-Compose with logs |
make build |
Rebuild all Docker images |
make configure |
Start the Okta LDAP Agent configuration |
Using Management Interfaces #
While command-line tools are powerful, graphical interfaces are more comfortable for daily administration.
This section will cover two approaches: the first with a light Web UI (ldap-ui) and the second with a powerful fat client.
Web-Based Management with ldap-ui #
There are many web management tools for LDAP, but the choice of using ldap-ui is due to:
phpLDAPadmin, a classic choice, is largely unmaintained and has significant compatibility issues with the modern PHP versions included in Ubuntu 24.04.LDAP Account Manager (LAM)is a powerful and feature-rich tool, but many of its advanced features are restricted to the paid “Pro” version.ldap-uiprovides a clean and simple interface for daily administrative tasks, is open-source, and well-maintained.
Access the ldap-ui interface #
- If you’re running you Docker Compose stack locally, you can simply open http://localhost:5000 in a web browser, and log in using
adminas username and thecn=adminpassword. - If you’re running it in a remote server, since there is no specific security, I warmly suggest:
- Publish it using a reverse proxy (i.e., nginx), or
- Create an SSH tunnel and then open the web portal from your PC instead of exposing port 5000 of the server
Once opened the tunnel open http://localhost:5000 in a web browser
ssh -f -N -L 5000:localhost:5000 ubuntu@myopenldapserver
More information about ldap-ui can be found in dnknth/ldap-ui Github repository.
Desktop Management with Apache Directory Studio #
Apache Directory Studio is the industry standard as a native desktop client (Eclipse-based) for heavy-duty LDAP work. It supports many types of directories, along with an LDIF editor, a Schema browser, and many advanced features.
-
Download - Visit the Apache Directory Studio downloads page and download the appropriate version for your operating system (e.g., macOS, Windows, Linux).
-
Install - Follow the standard installation procedure for your OS.
Install on Silicon MacOS (M1/M2/M3/M4 - ARM CPU) #
New MacBooks have a Silicon (ARM-based) CPU, while Apache Directory Studio is compiled for x86. In order to run it properly, you need to follow some additional steps:
- Rosetta 2, which enables the use of apps that were built for a Mac with an Intel processor:
/usr/sbin/softwareupdate --install-rosetta \ --agree-to-license - Homebrew, a powerful package manager for macOS:
/bin/bash -c "$(curl -fsSL \ https://raw.githubusercontent.com/Homebrew/\ install/HEAD/install.sh)" - An x86 Java SDK:
arch -x86_64 brew install oracle-jdk - You can then install Apache Directory Studio directly with brew:
brew install apache-directory-studio
- Rosetta 2, which enables the use of apps that were built for a Mac with an Intel processor:
-
Create a New Connection
- Launch Apache Directory Studio.
- Go to File → New… → LDAP Connection.
- Hostname:
localhost - Port:
1389. (or1636for LDAPS) - Click “Check Network Parameter” to verify connectivity.
- On the next screen, enter the Bind DN (
cn=admin,dc=galaxy,dc=universe) and your Admin password. - Click Finish.
You can now use the LDAP Browser to explore, edit, and manage the directory.
Managing the Okta-LDAP Integration #
Once the agent is connected, you can configure the integration from your Okta Admin Console.
Complete the LDAP configuration in Okta #
- Open the Okta Admin Console and go to Directory → Directory Integrations
- You will find a “Not yet configured” LDAP in the list. Click on the “LDAP” link:

- Configure using the following parameters:
- LDAP Version:
OpenLDAP - Objects
- Unique Identifier Attribute:
entryuuid - DN Attribute:
entrydn
- Unique Identifier Attribute:
- User
- User Search Base:
ou=People,dc=galaxy,dc=universe - Object Class:
inetorgperson - User Object Filter:
(objectclass=inetorgperson) - Account Disabled Attribute:
faxTo simplify things with a simple demo, we are not implementing any password/lockout policy at the LDAP Server level. Despite this, Okta needs to define an attribute to enable/disable users. So we are configuring an unused attribute (thefax). In a real environment, this attribute will be the one defined by the lockout and password policy. - Account Disabled Value:
TRUE - Account Enabled Value:
FALSE - Password Attribute:
userpassword
- User Search Base:
- Group
- Group Search Base:
ou=Groups,dc=galaxy,dc=universe - Group Object Class:
groupofuniquenames - Group Object Filter:
(objectclass=groupofuniquenames) - Member Attribute:
uniqueMember
- Group Search Base:
- Role
- Object Class: leave blank
- Membership Attribute: leave blank
- Validate Configuration
- Okta username format: User Id (UID)
- Example username:
yoda@galaxy.local
- Click on “Test Configuration”. You will see the user details:
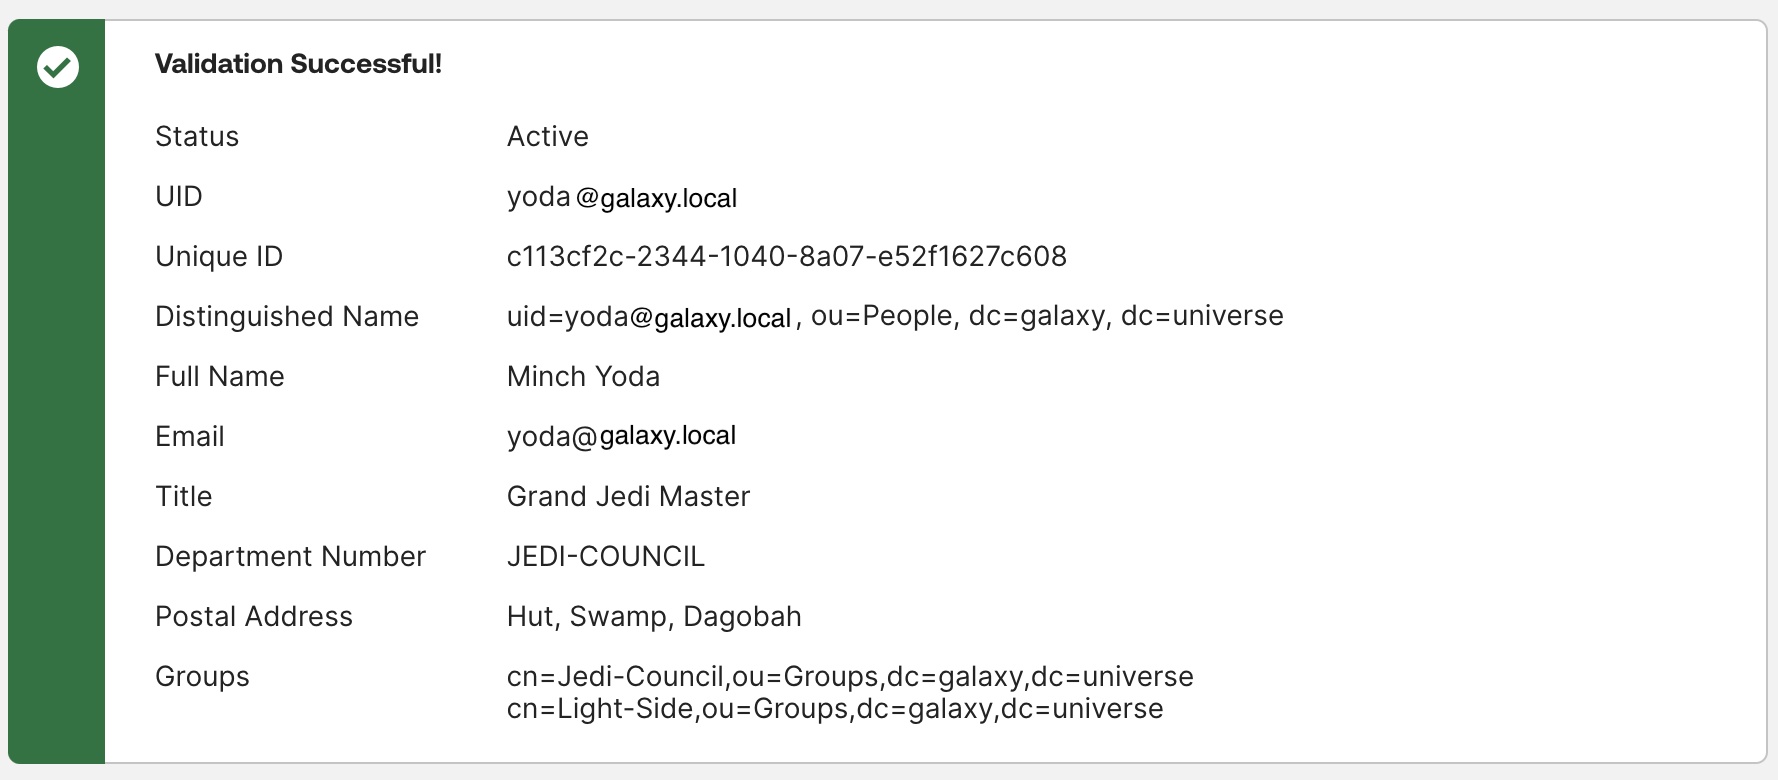
- Click “Next”
- Click “Done”

- LDAP Version:
Importing Users and Groups #
-
Configure Import Settings
- In your Okta Admin Console, go to the settings for your newly configured LDAP directory.
- Navigate to the Provisioning → To Okta tab.
- Configure the settings:
- Schedule import:
every hour(or choose another timeframe) - Okta Username Format:
Email - flag “
Don't send new user activation emails for this domain” and “Create and update users on login” - Enable “
Auto-confirm new users” and “Auto-activate new users”
- Schedule import:
-
Run a manual Import
- Navigate to the Import tab.
- Click Import Now. Okta will scan your LDAP directory and import the users and groups
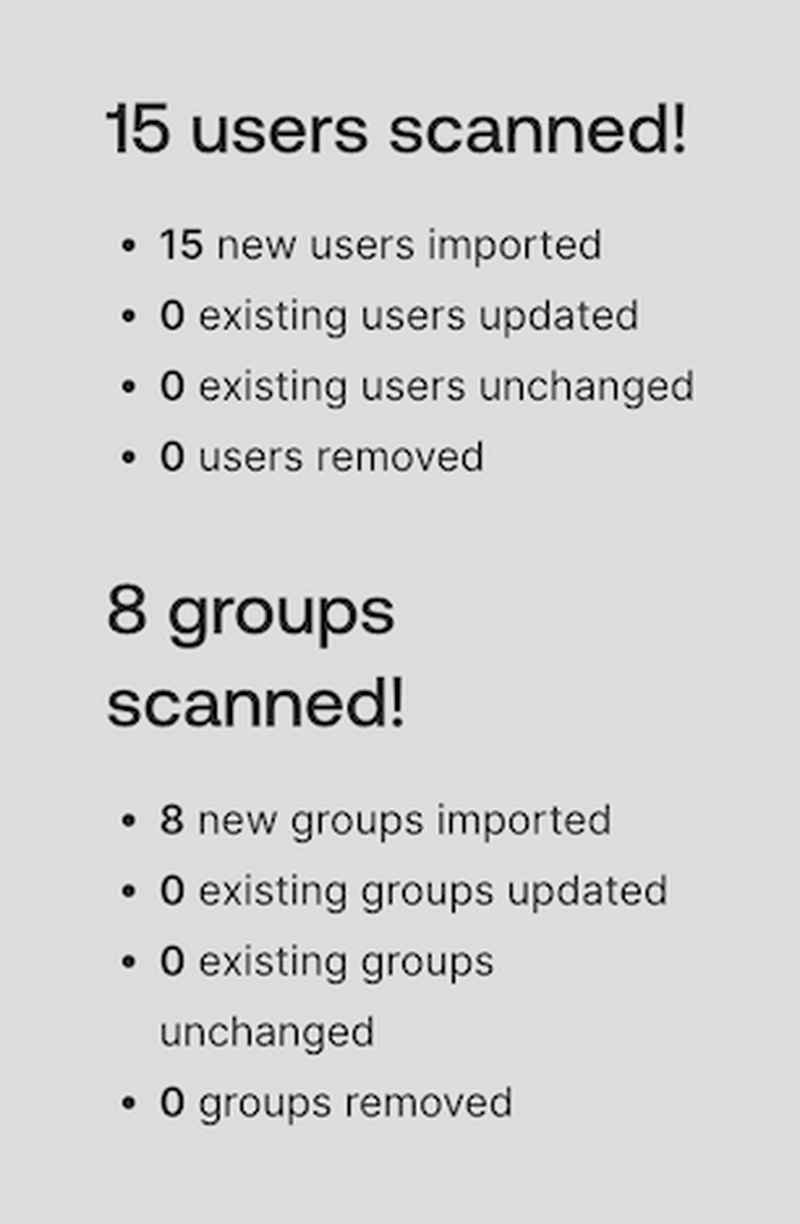
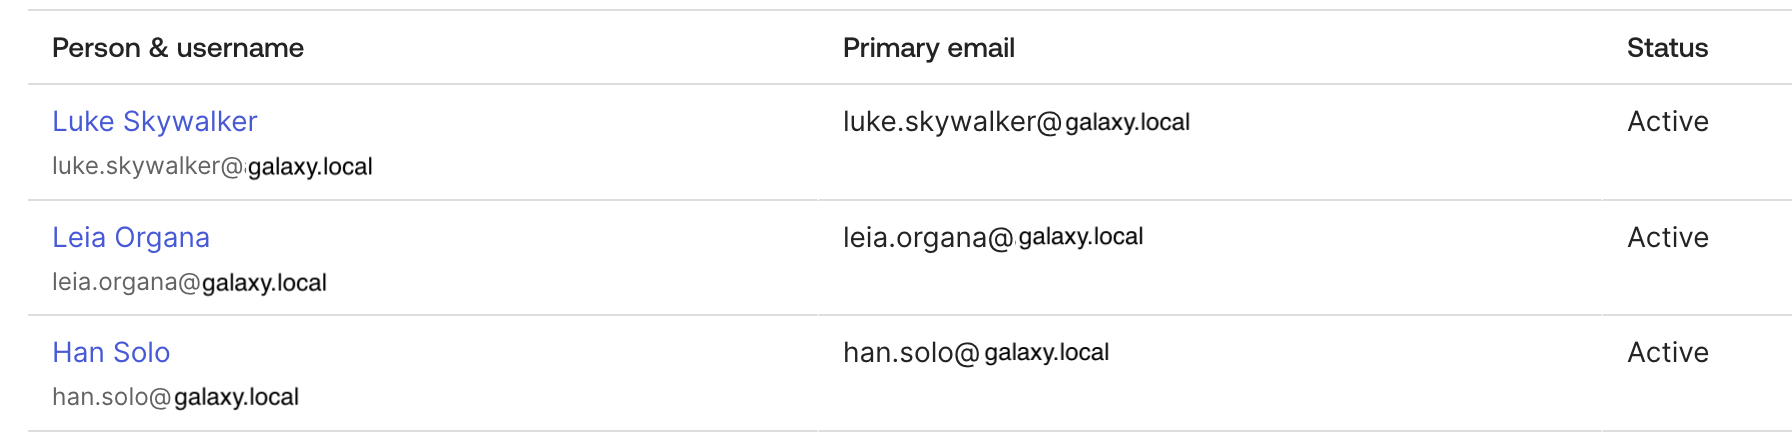
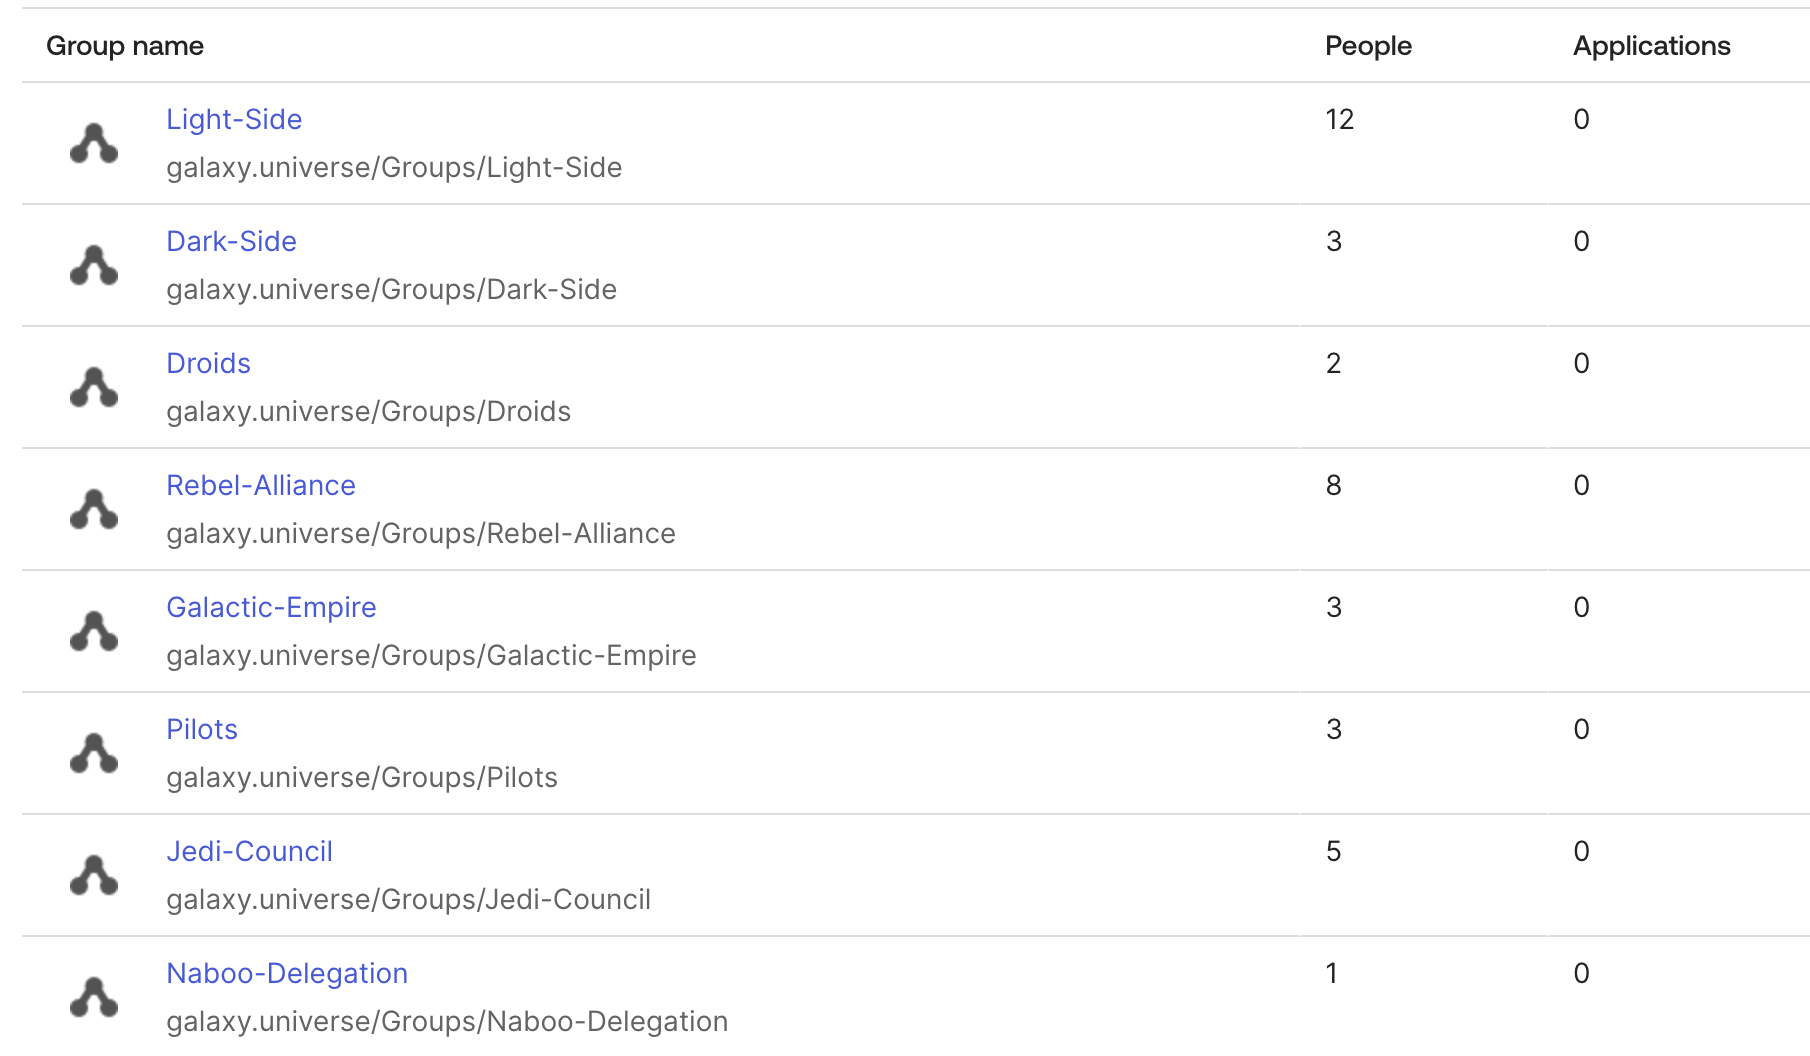
- You will see the LDAP Users and Groups in your Okta Directory
Delegated Authentication #
Enable Delegated Authentication and allow users to authenticate against your OpenLDAP directory.
- Navigate to Security → Delegated Authentication.
- Enable LDAP Authentication.
- Test with an existing user and their password
Attribute Mapping and Custom Schema #
In the following chapters, we’ll import various LDIF files. You have various options for doing this:
-
Docker desktop - you can open the
lab-ldap-openldap-1container terminal and run the commands directly:- Open Docker Desktop
- Select the
lab-ldap-openldap-1container - Click on Exec
- Run the commands in the container terminal

-
Docker Compose CLI - directly from your host OS, you can run the following command to open a bash terminal in the container, and then run the
ldapmodifycommands inside it.docker compose exec openldap bashAlternatively, you can run the commands directly from your host OS, by using
docker compose exec openldap ldapmodify ... -
Apache Directory Studio - you can import the LDIF files graphically:
- Open Apache Directory Studio and connect to your LDAP server
- Right-click on your connection and select Import → LDIF Import…
- Select the LDIF file you want to import
- Follow the prompts to complete the import process
You can map attributes between Okta and LDAP, including custom ones.
-
Extend the Schema You can load the ready-to-use file
5.schema.ldif, and run:ldapmodify -Y EXTERNAL -H ldapi:/// -f ./src/ldifs/5.schema.ldifThe file contains the following:
-
Extend the OpenLDAP Schema - To add a custom attribute (e.g.,
species), you must first define it in your OpenLDAP schema.# Add the new attribute type 'species' dn: cn=LucasfilmPerson,cn=schema,cn=config objectClass: olcSchemaConfig cn: LucasfilmPerson olcAttributeTypes: ( 1.3.6.1.4.1.55555.1.2 NAME 'species' DESC 'The species of the person' EQUALITY caseIgnoreMatch SUBSTR caseIgnoreSubstringsMatch SYNTAX 1.3.6.1.4.1.1466.115.121.1.15 SINGLE-VALUE ) olcObjectClasses: ( 1.3.6.1.4.1.55555.2.2 NAME 'LucasfilmPerson' DESC 'Lucasfilm person attributes' SUP top AUXILIARY MAY ( species ) ) -
(Optional) Load the constraint module and create a constraint rule in order to accept only some type of data in the new attribute (in this case, for example, we will accept only one from Wookiee, Human, Droid, Gungan, Ewok, Yoda, or Clone):
# Load the constraint module
dn: cn=module,cn=config
changetype: add
cn: module
objectClass: olcModuleList
olcModuleLoad: constraint.so

# Load the constraint overlay on your database
dn: olcOverlay=constraint,olcDatabase={2}mdb,cn=config
changetype: add
objectClass: olcOverlayConfig
objectClass: olcConstraintConfig
olcOverlay: constraint
olcConstraintAttribute: species regex "^(Wookiee|Human|Droid|Gungan|Ewok|Yoda|Clone)$"
-
-
Update the users
Also here, you can load the ready-to-use file
6.updateusers.ldif, and run:ldapmodify -Y EXTERNAL -H ldapi:/// -f ./src/ldifs/6.updateusers.ldifThe file contains a series of lines like:
dn: uid=luke.skywalker@galaxy.local,ou=People,dc=galaxy,dc=universe changetype: modify add: objectClass objectClass: LucasfilmPerson - add: species species: Human [...] -
Map the Attribute in Okta
- Go to Directory → Directory Integrations and select your LDAP directory
- In the Provisioning → Integration tab, add
LucasfilmPersonas an Auxiliary Object Class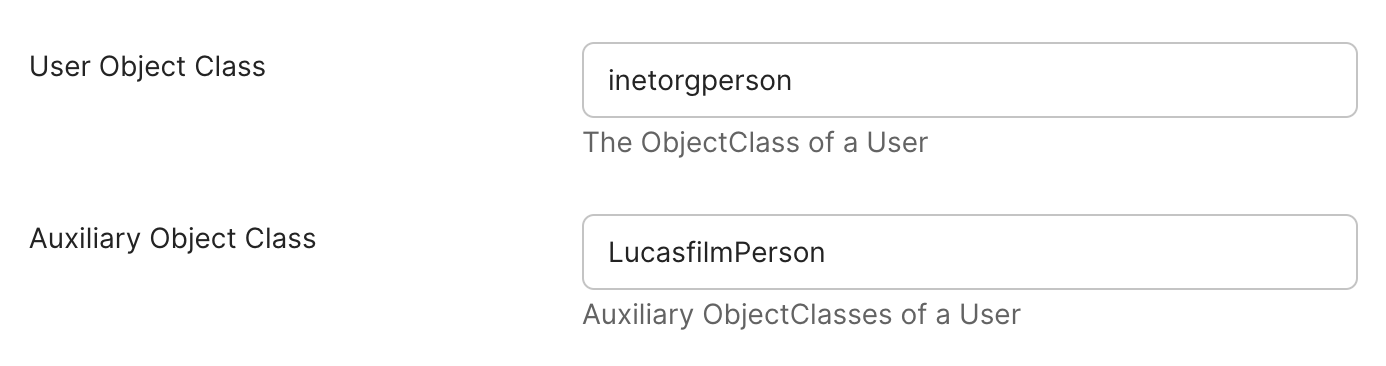
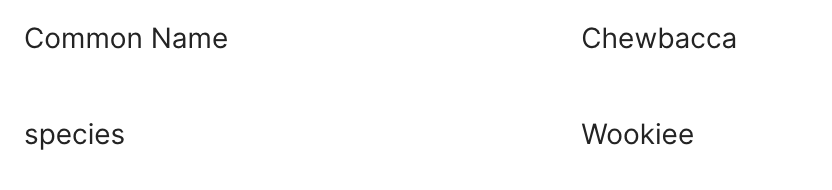
- Test the configuration with a user (i.e.
yoda@galaxy.local) and save - Go to Directory → Profile Editor → Okta → User (default)
- Click Add Attribute
- Create a new attribute named Species
- Data type:
string - Display name:
Species - Variable name:
species - Description:
- (optional) Enum: insert the following list:
Wookiee, Human, Droid, Gungan, Ewok, Yoda, Clone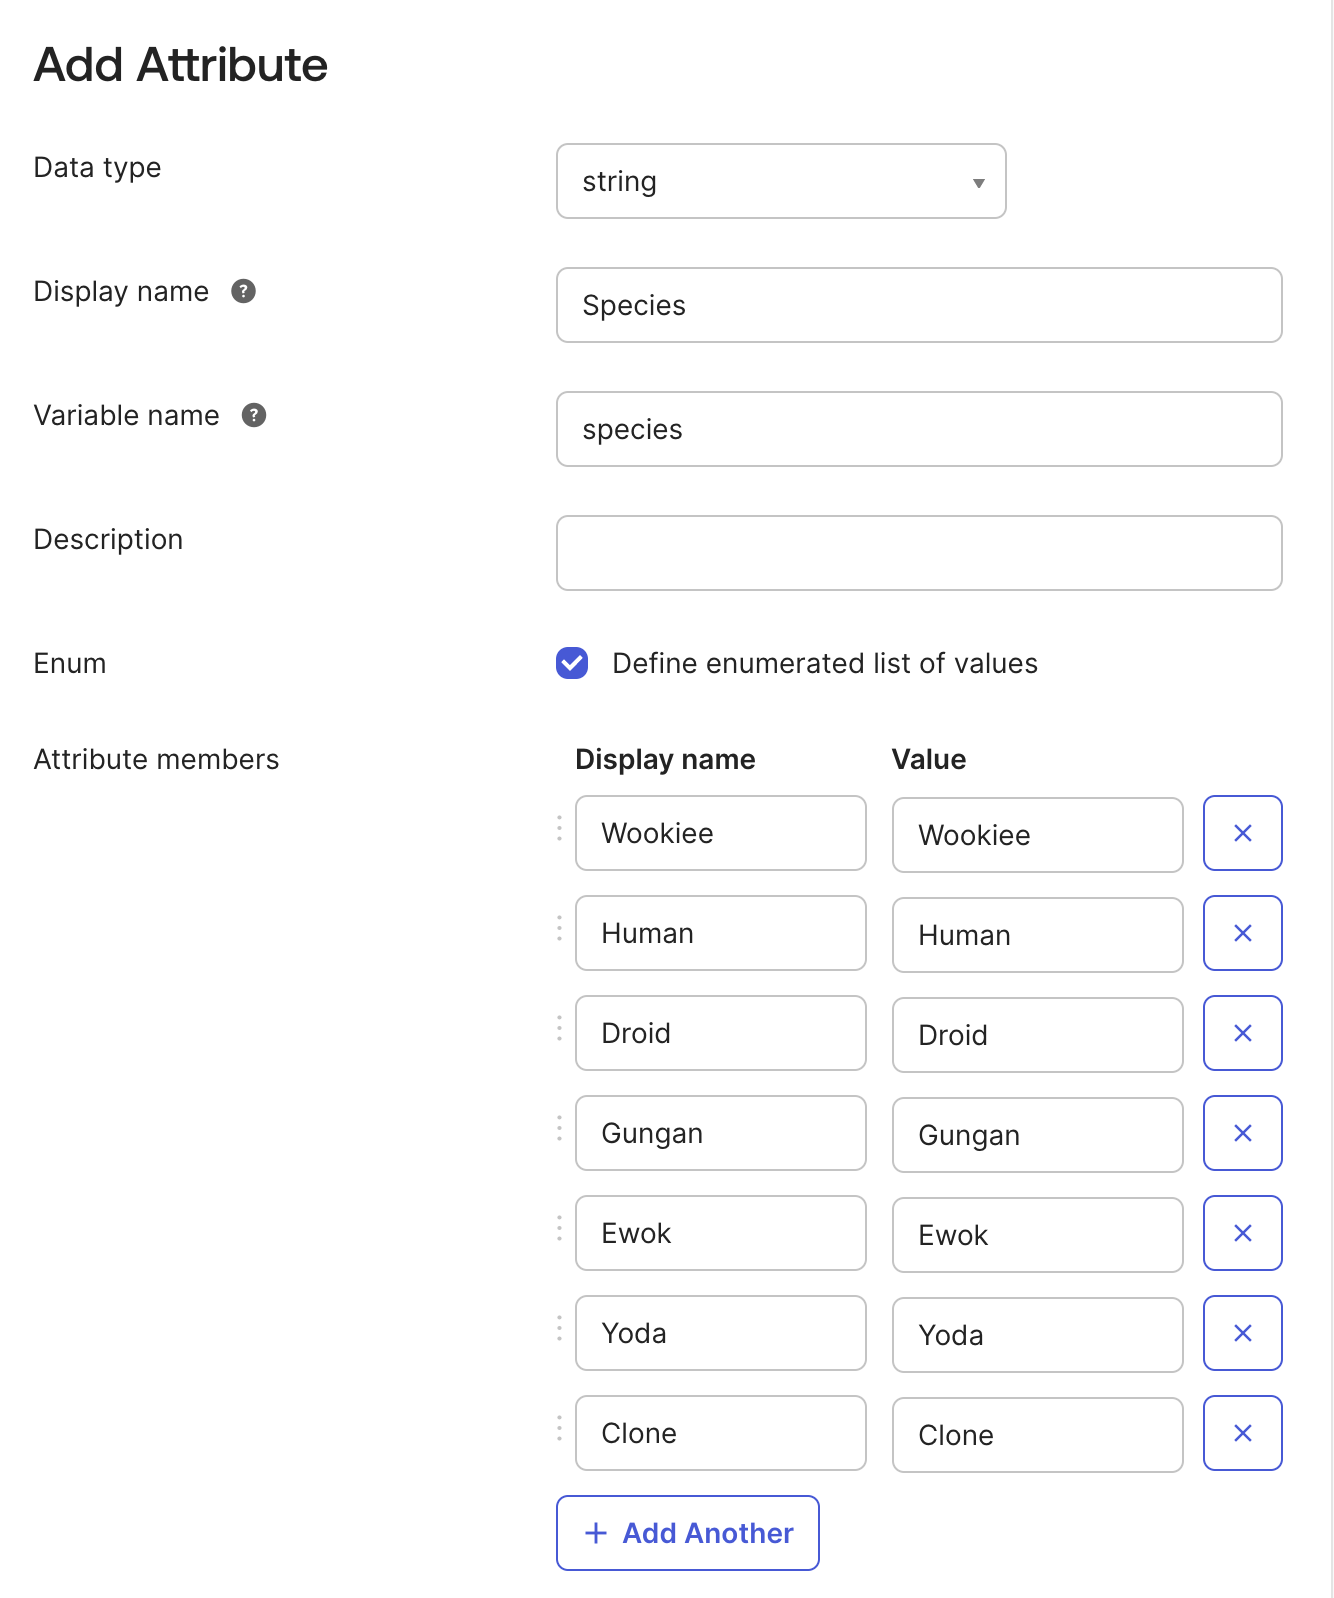
- Data type:
- Go back to Directory → Profile Editor → Directories
- Find your LDAP directory profile and click Add Attributes
- Search and select
species, then Save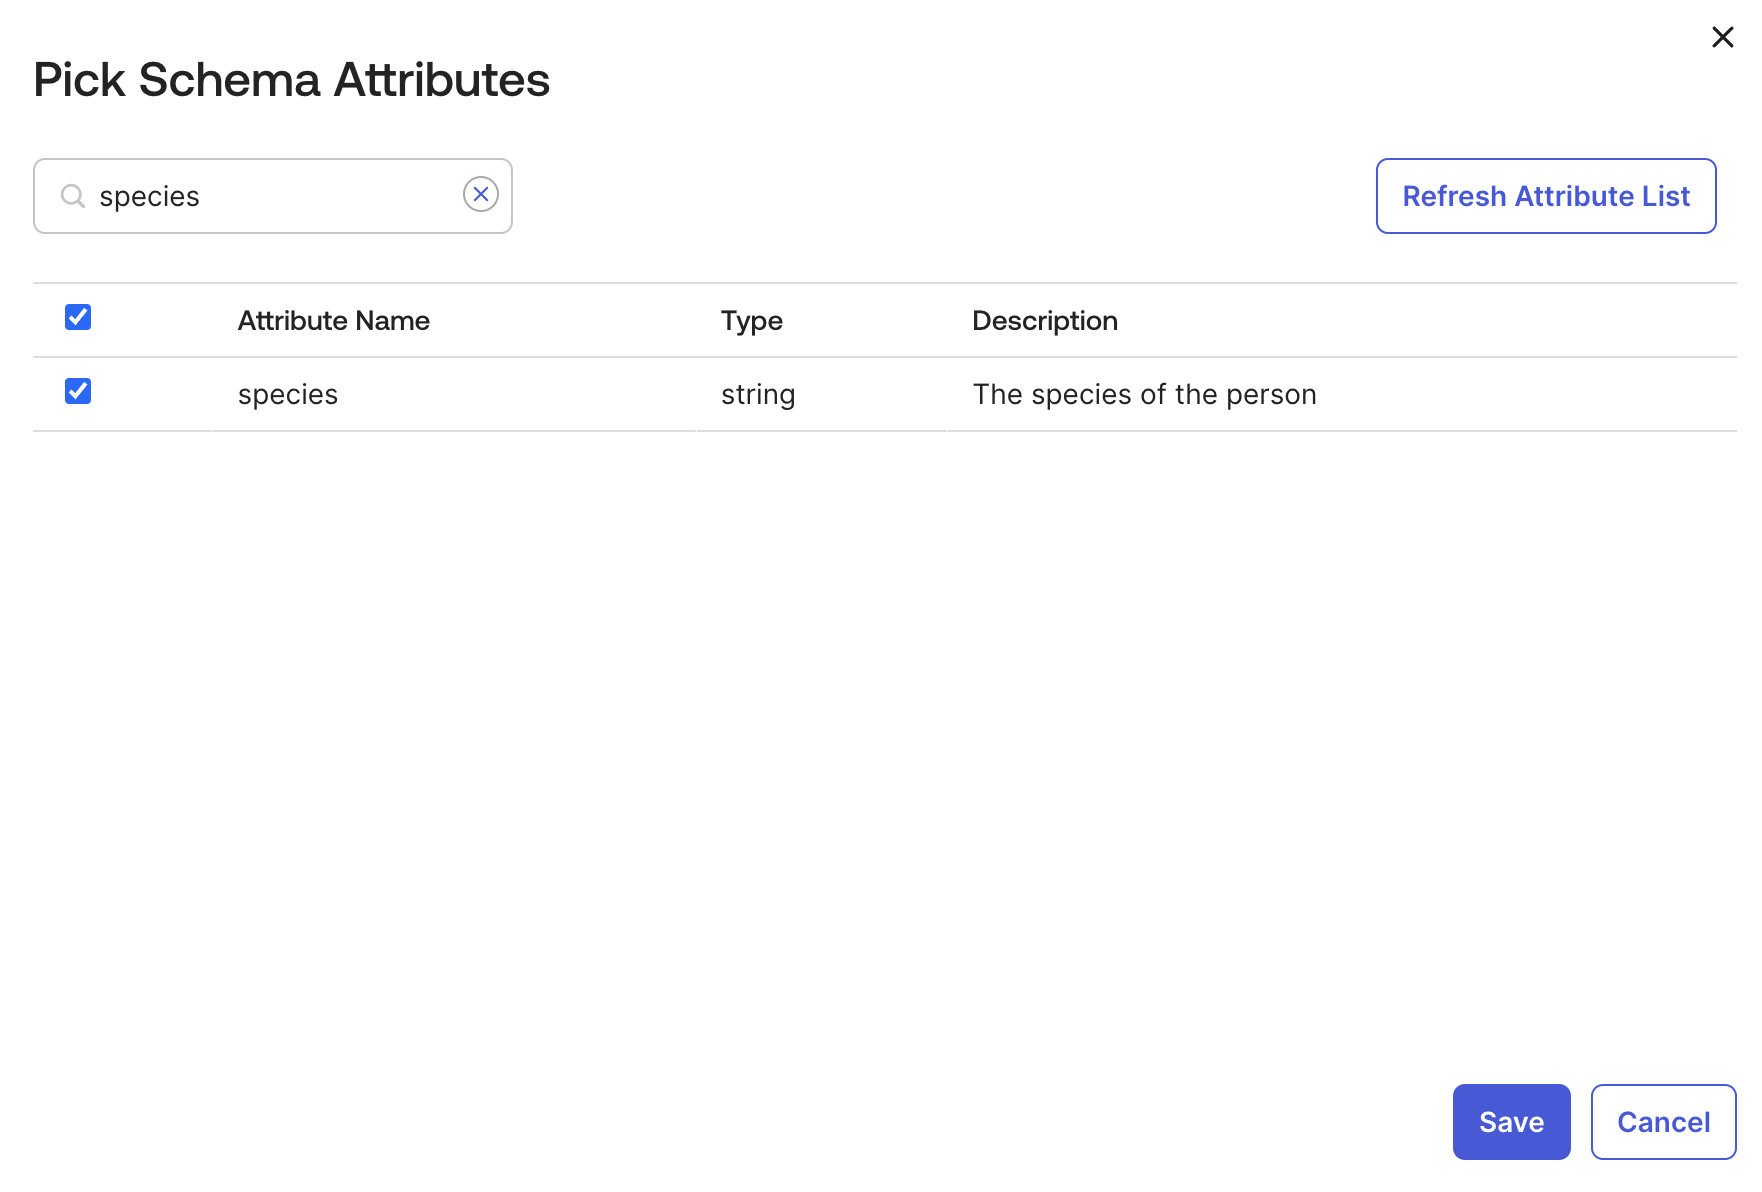
- Click on Mappings.
- Map the LDAP ‘species’ attribute with Okta’s attribute in both directions (LDAP to Okta, and Okta to LDAP) and then Save

- Go back to Directory → Directory Integrations, select your LDAP directory, and run an LDAP import. Verify that the field is populated for the users
Provisioning from Okta to LDAP #
You can also create and manage users in LDAP directly from Okta.
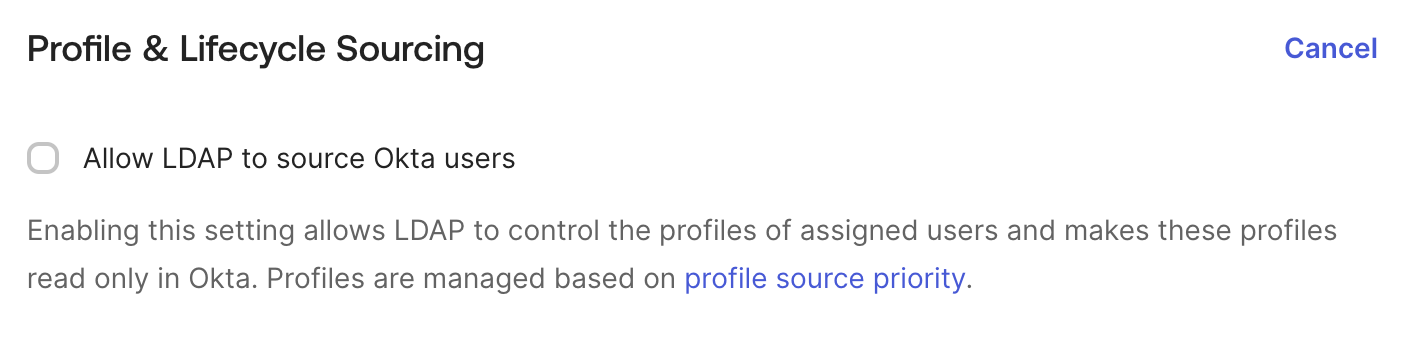
-
Disable the Profile Sourcing
- Go to the Provisioning → To Okta tab for your LDAP integration.
- Remove the flag from “Allow LDAP to source Okta users”
-
Enable Provisioning
- Go to the Provisioning → To App tab for your LDAP integration.
- Enable the features you need, such as Create Users, Update User Attributes, and Deactivate Users.
- For “Create Users” use the following parameters:
- Activation email recipient: your email address (or an galaxy.local alias)
- RDN attribute name:
uid⚠️ this is very important
- Change the mapping for the Distinguished Name
dnattribute, by using the following expression:"uid=" + user.login + ",ou=People,dc=galaxy,dc=universe"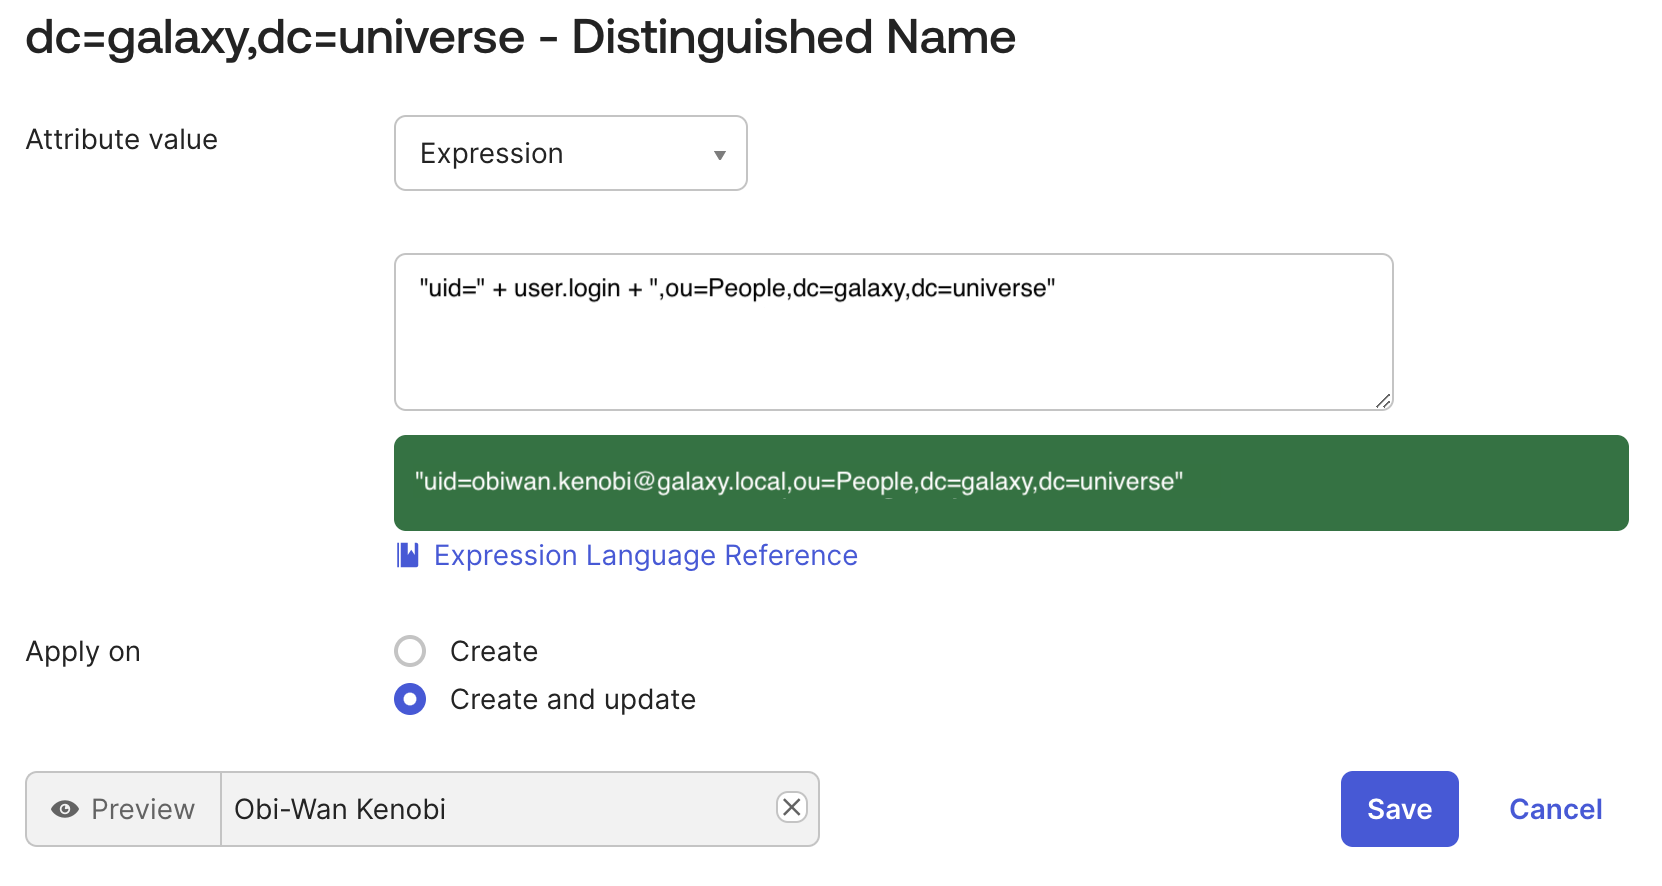
- Change the mapping for the Common Name (
cn) attribute, and map it to the Okta attribute “Display Name”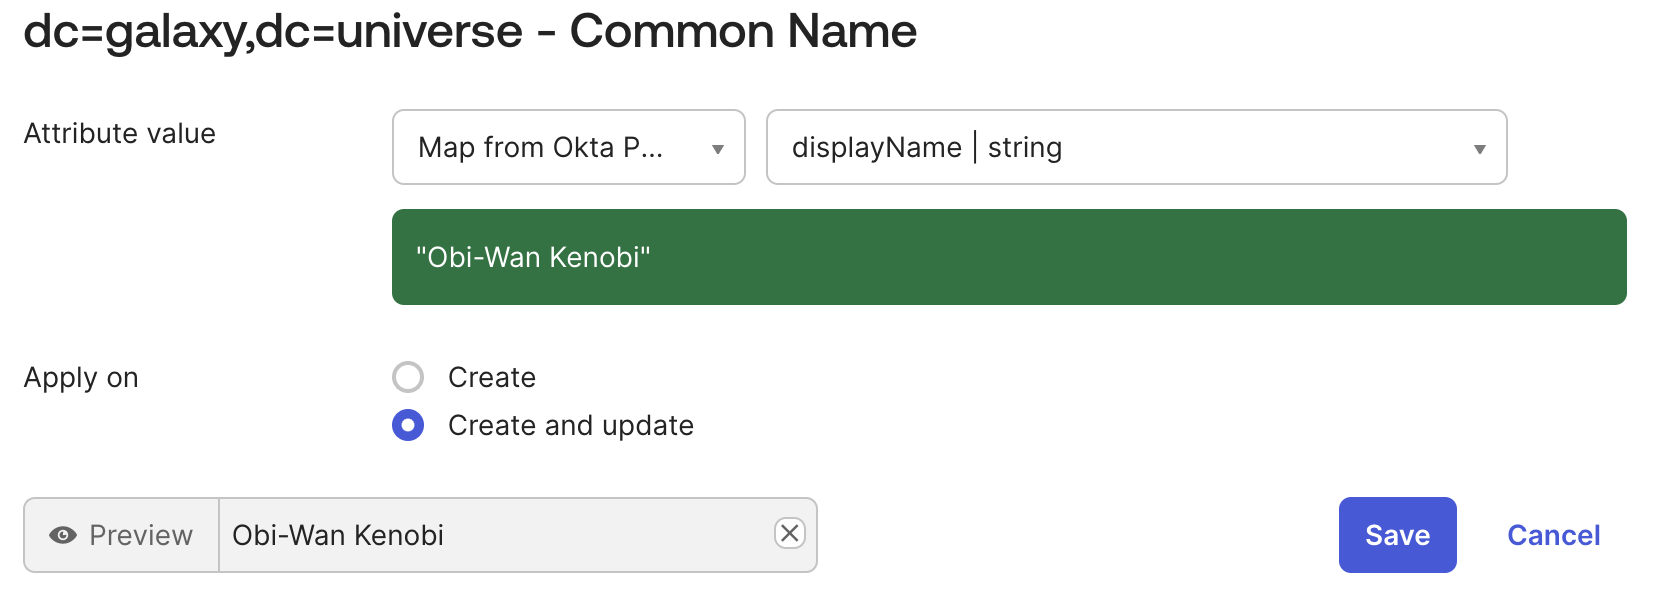
- Optionally map the other optional attributes, such as
managerDnpostalAddress
-
Create two new users:
- Jar Jar
- First name:
Jar Jar - Last name:
Binks - Username:
jarjar@galaxy.local - Primary email:
jarjar.binks@galaxy.local - Title:
Junior Representative - DepartmentNumber:
GUNGAN-GRAND-ARMY - Organization:
Resistance - Postal Address:
Otoh Gunga, Naboo - DisplayName:
Jar Jar - employeeNumber:
10030 - Species:
Gungan
- First name:
- Boba Fett
- First name:
Boba - Last name:
Fett - Username:
boba.fett@galaxy.local - Primary email:
boba.fett@galaxy.local - Title:
Bounty Hunter - DepartmentNumber:
BOUNTY-HUNTERS-GUILD - Organization:
Empire - Postal Address:
Slave I, Outer Rim - Display Name:
Boba Fett - employeeNumber:
8084 - Species:
Clone
- First name:
- Jar Jar
-
Create an LDAP Provisioning group
- In the Directory → People → Groups section, click on “Add Group”
- name it “
LDAP Provisioning” - Once created, click on it and go to the Directories tab
- Click on Manage directories
- Add the LDAP Directory as a member and click Next
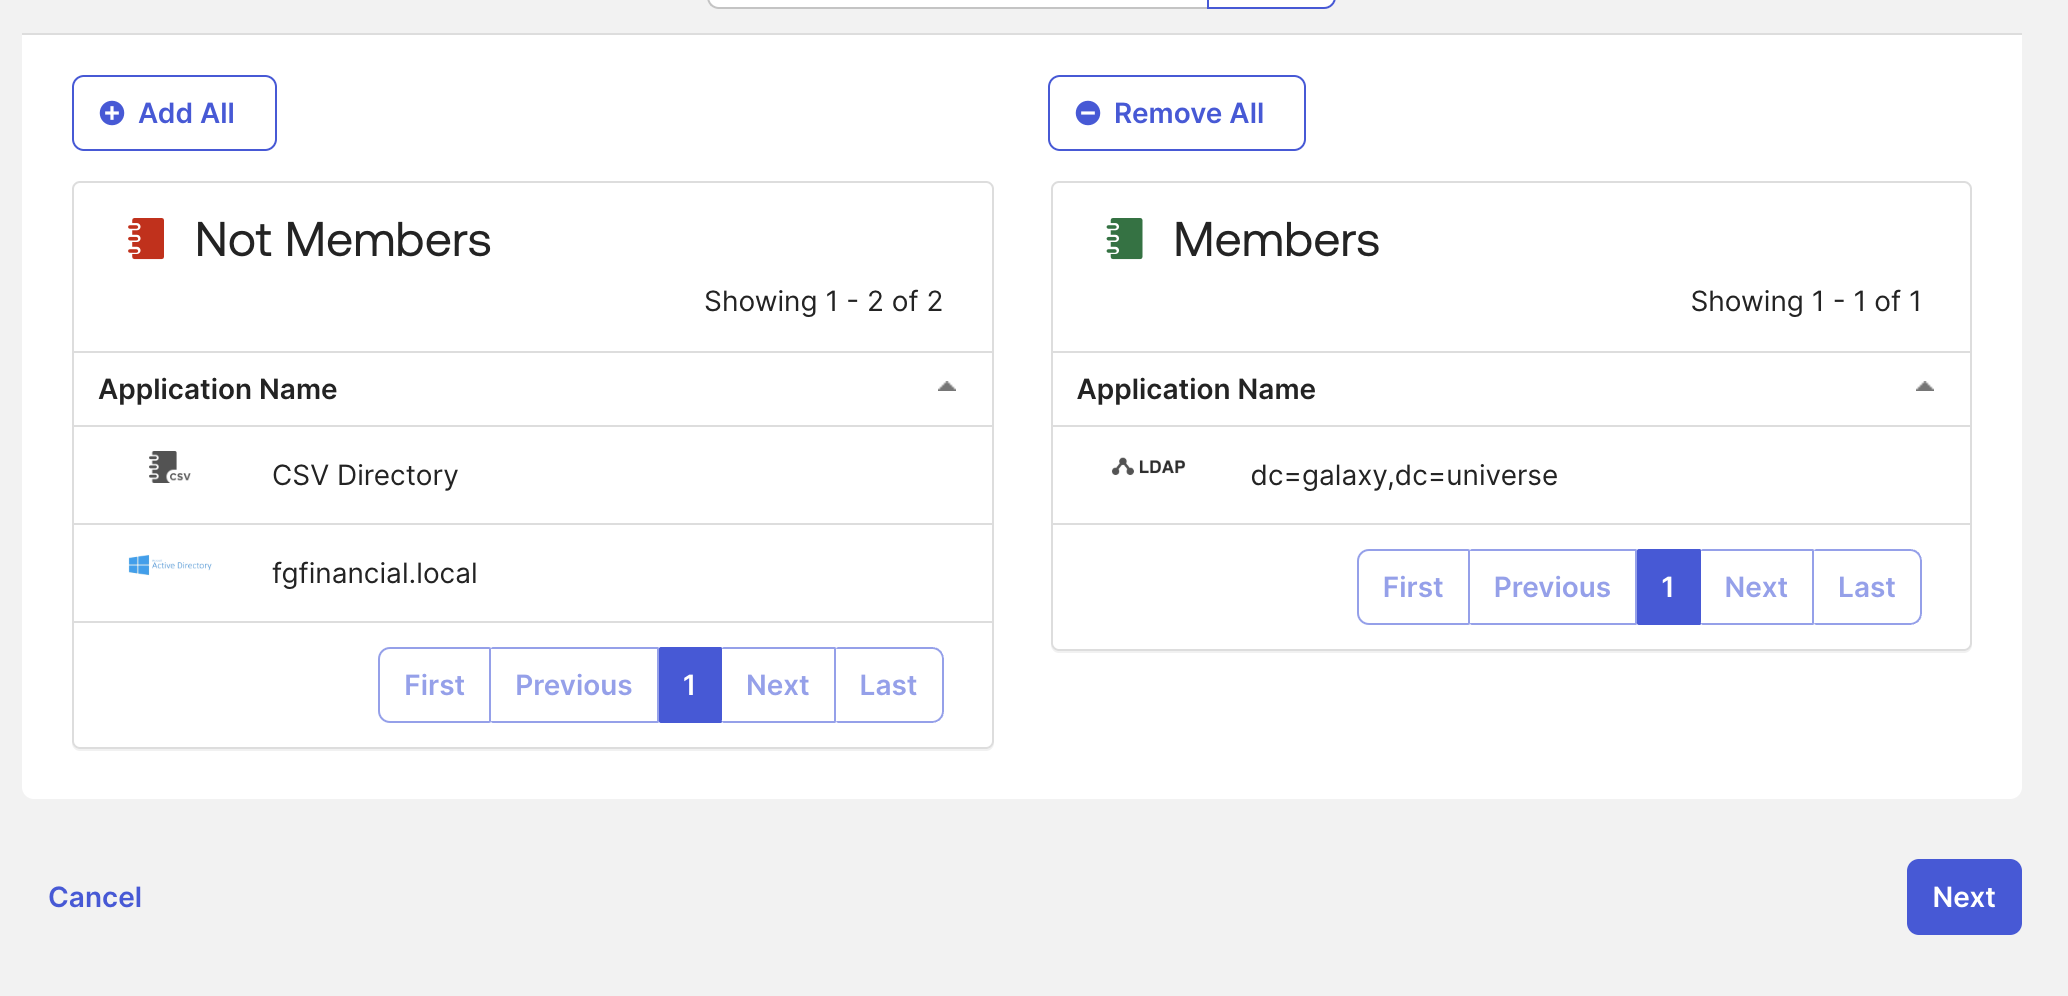
- Insert
ou=People,dc=galaxy,dc=universeas Provisioning Destination DN - Click “Confirm Changes”
-
Add the two users (
Jar JarandBoba Fett) to the “LDAP Provisioning” Group -
You will then see the users created in the LDAP directory

Password reset #
You can also enable Self-Service Password Reset (SSPR) for LDAP Users.
pwdReset attribute to TRUE when a password is expired (for example, OpenLDAP and IBM)
- In the Admin Console, go to Security → Delegated Authentication.
- Click the LDAP tab.
- In Delegated Authentication, click Edit.
- Verify that Enable delegated authentication to LDAP is enabled.
- Go to Security → Authenticators, click on the Actions dropdown near Password, and select Edit
- Select “LDAP Policy” from the list on the left
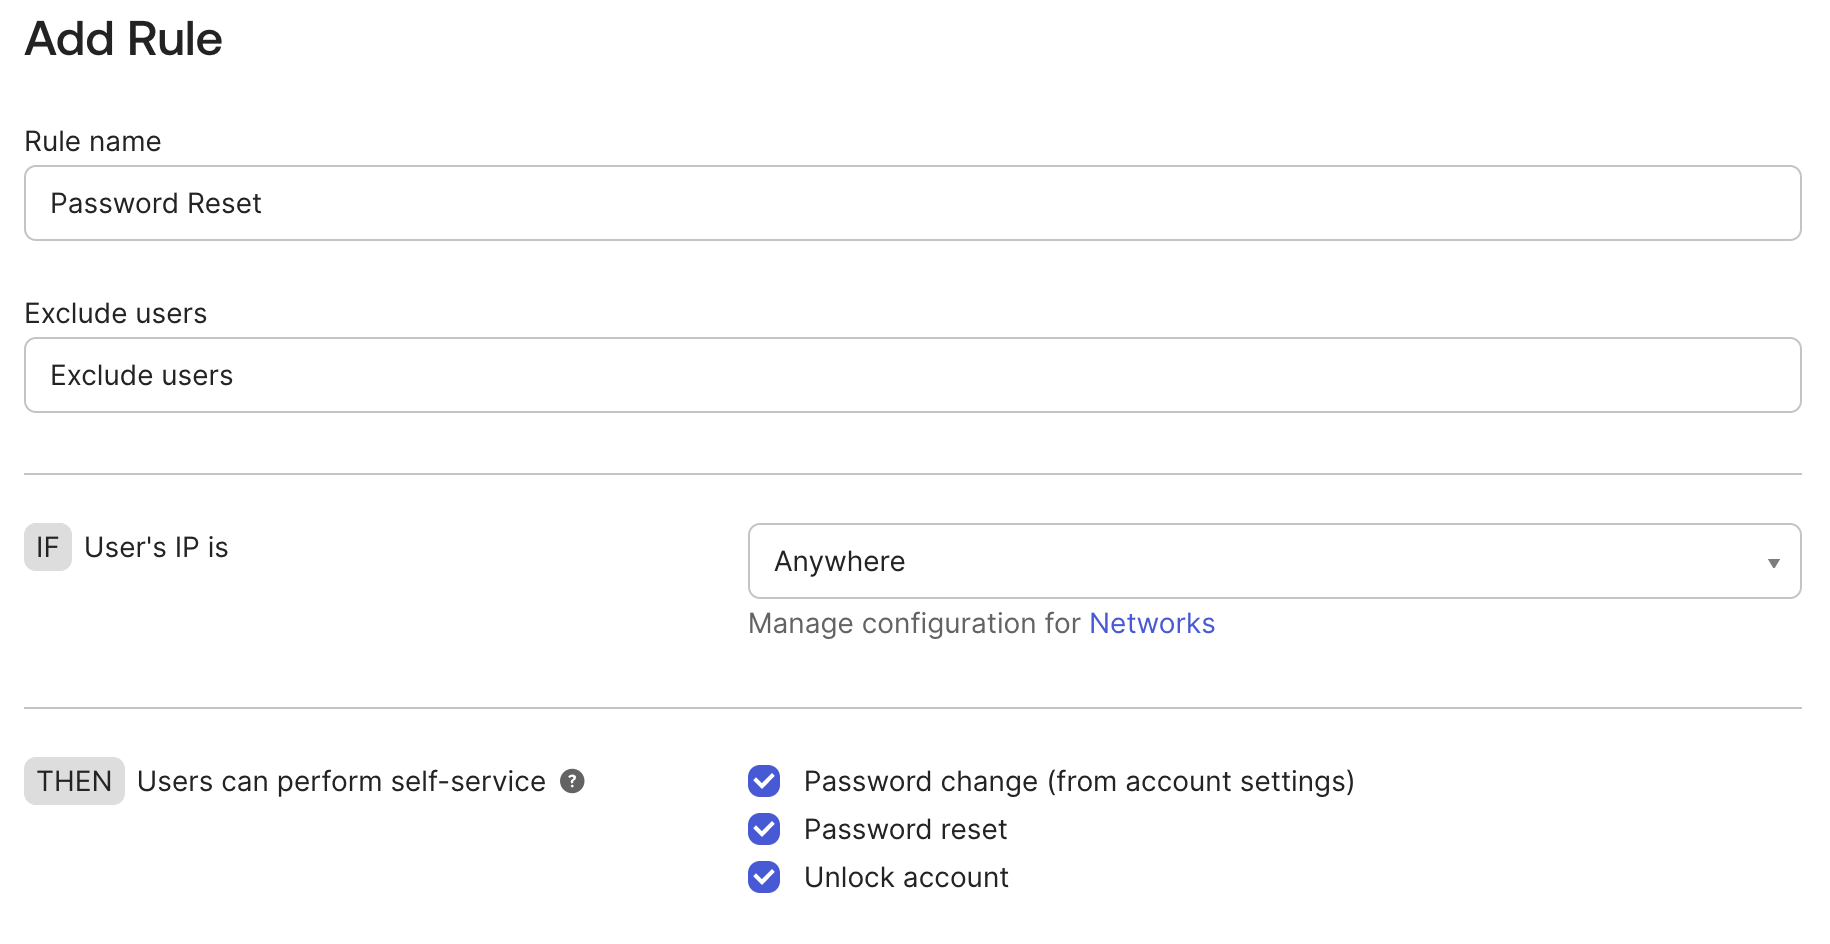
- Scroll to the bottom and click Add Rule
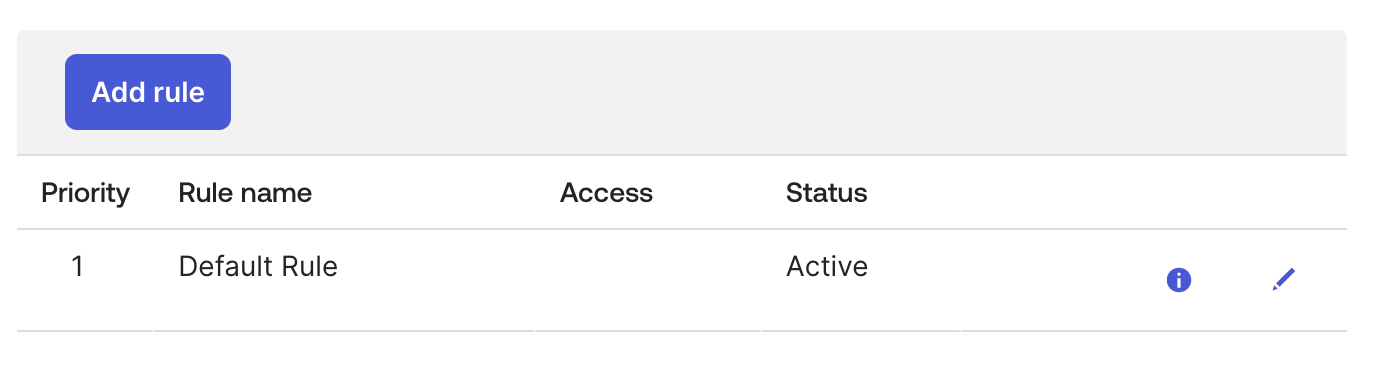
- Create a new rule and enable Users can perform self-service options
Password validation #
Use the pwdPolicy object class and pwdPolicySubentry attribute to implement OpenLDAP-specific password policies. You can refer to the OpenLDAP manual on how to configure password policies inside the LDAP server.
Best Practice: It’s always preferable to have the same password policy in Okta and the LDAP server so that Okta can prevent passwords not associated with the policy before contacting the LDAP server.
Regarding unlock, it is preferable to set the number of attempts before lock to a smaller number in Okta than in the LDAP server. With this method, Okta can lock the user before it is locked in the LDAP server.
OU Change #
OU moves for LDAP-provisioned users
Recently, Okta added a feature that permits changing the OU for LDAP-provisioned users. Before, this feature was available only for Active Directory and not LDAP.
When an admin configures Okta to LDAP provisioning settings, they can now move users to a different Organizational Unit (OU) by changing their group assignments. See Configure Okta to LDAP provisioning settings. (From Okta’s release notes - Version: 2025.07.0)
Load the file 8.new-ous.ldif by running:
ldapadd -Y EXTERNAL -H ldapi:/// -f ./src/ldifs/8.new-ous.ldifThe file contains instructions to create new OUs:
# --- CREATE NEW ORGANIZATIONAL UNITS ---

dn: ou=Jedi,ou=People,dc=galaxy,dc=universe
objectClass: organizationalUnit
ou: Jedi

dn: ou=Resistance,ou=People,dc=galaxy,dc=universe
objectClass: organizationalUnit
ou: Resistance

dn: ou=Empire,ou=People,dc=galaxy,dc=universe
objectClass: organizationalUnit
ou: Empire

dn: ou=Droid,ou=People,dc=galaxy,dc=universe
objectClass: organizationalUnit
ou: Droid
We can now change the OU using an LDIF, for example:
# --- MOVE USERS TO NEW OUs ---

dn: uid=luke.skywalker@galaxy.local,ou=People,dc=galaxy,dc=universe
changetype: modrdn
newrdn: uid=luke.skywalker@galaxy.local
deleteoldrdn: 1
newsuperior: ou=Jedi,ou=People,dc=galaxy,dc=universe
But, since we want to demonstrate Okta, let’s see how to manage the OU changes using Okta:
-
Go to Settings → Features and enable the Early Access feature Support user moves across OUs in LDAP

-
Go back to Directory → Directory Integrations, click on LDAP and Provisioning → To App
-
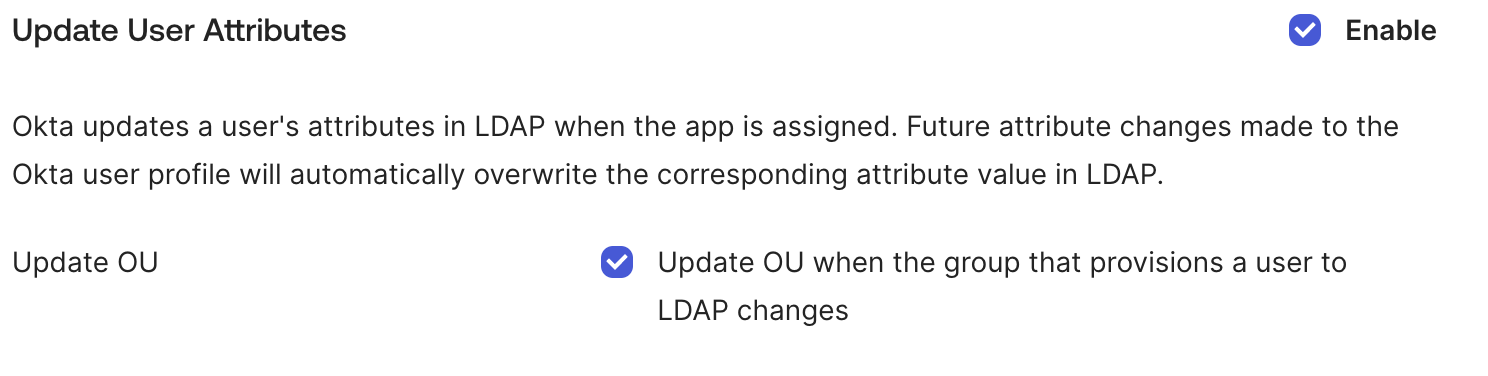
Enable both Update User Attributes and Update OU when the group that provisions a user to LDAP changes
-
Create a new group named “LDAP Provisioning - Resistance”
Follow the same instructions as Provisioning from Okta to LDAP
But change the Provisioning Destination DN value to ou=Resistance,ou=People,dc=galaxy,dc=universe
- Pick the user Jar Jar Binks, remove him from the group “LDAP Provisioning” and add him to the group “LDAP Provisioning - Resistance”
- You will find Jar Jar moved to the Resistance OU

You can then continue by generating other groups, such as “LDAP Provisioning - Empire” and so on
As an alternative, we can do the same operation with an LDIF file:
ldapadd -Y EXTERNAL -H ldapi:/// -f ./src/ldifs/9.change-ou.ldifGroup Push #
The Group Push feature, which synchronizes group memberships from Okta to an application, is not currently supported for OpenLDAP directories. This functionality is on Okta’s product roadmap.
This article will be updated as soon as the feature will be available.
Manual Installation #
This section details the manual process of setting up an OpenLDAP server from scratch on a clean Ubuntu 24.04 installation, and assumes that the operating system is already installed (e.g., deploying an EC2 VM on AWS). It’s an alternative if you cannot use Docker, or if you want a system that it’s then production-ready.
For a Demo/PoC, an EC2 t3.micro instance (included in the free tier) is enough.
OpenLDAP Server Installation and Configuration #
-
System Preparation #
Update the system packages to latest version:
sudo apt update && sudo apt upgrade -
OpenLDAP Installation #
Install the OpenLDAP server (
slapd) and command-line utilities (ldap-utils):sudo apt update && sudo apt install -y slapd ldap-utils -
Core OpenLDAP Configuration #
The
slapdpackage includes an interactive configuration wizard, which is critical for defining the Directory’s structure. Even if you can change these settings later, it is better and quicker to provide the right information during this step.Execute the configuration tool:
sudo dpkg-reconfigure slapdFollow the Prompts #
Answer the questions as follows:
- Omit OpenLDAP server configuration? → No.
- DNS domain name? →
galaxy.universeThis is the most important setting. It automatically generates the directory’s Base Distinguished Name (DN). Forgalaxy.universe, the wizard createsdc=galaxy,dc=universe. - Organization name? → The Galaxy
- Administrator password? → Enter a password (e.g.,
adminpassword). - Confirm password: → Re-enter the password.
- Database backend? → MDB
- Do you want the database to be removed when slapd is purged? → No
- Move old database? → Yes.
-
Verification #
-
Check Service Status #
sudo systemctl status slapdThe service should be
active (running). -
Inspect the Directory #
Use
slapcat, which will show the entire content of the LDAP database:sudo slapcatYou should see the base structure for
dc=galaxy,dc=universe, and the admin user (cn=admin,dc=galaxy,dc=universe).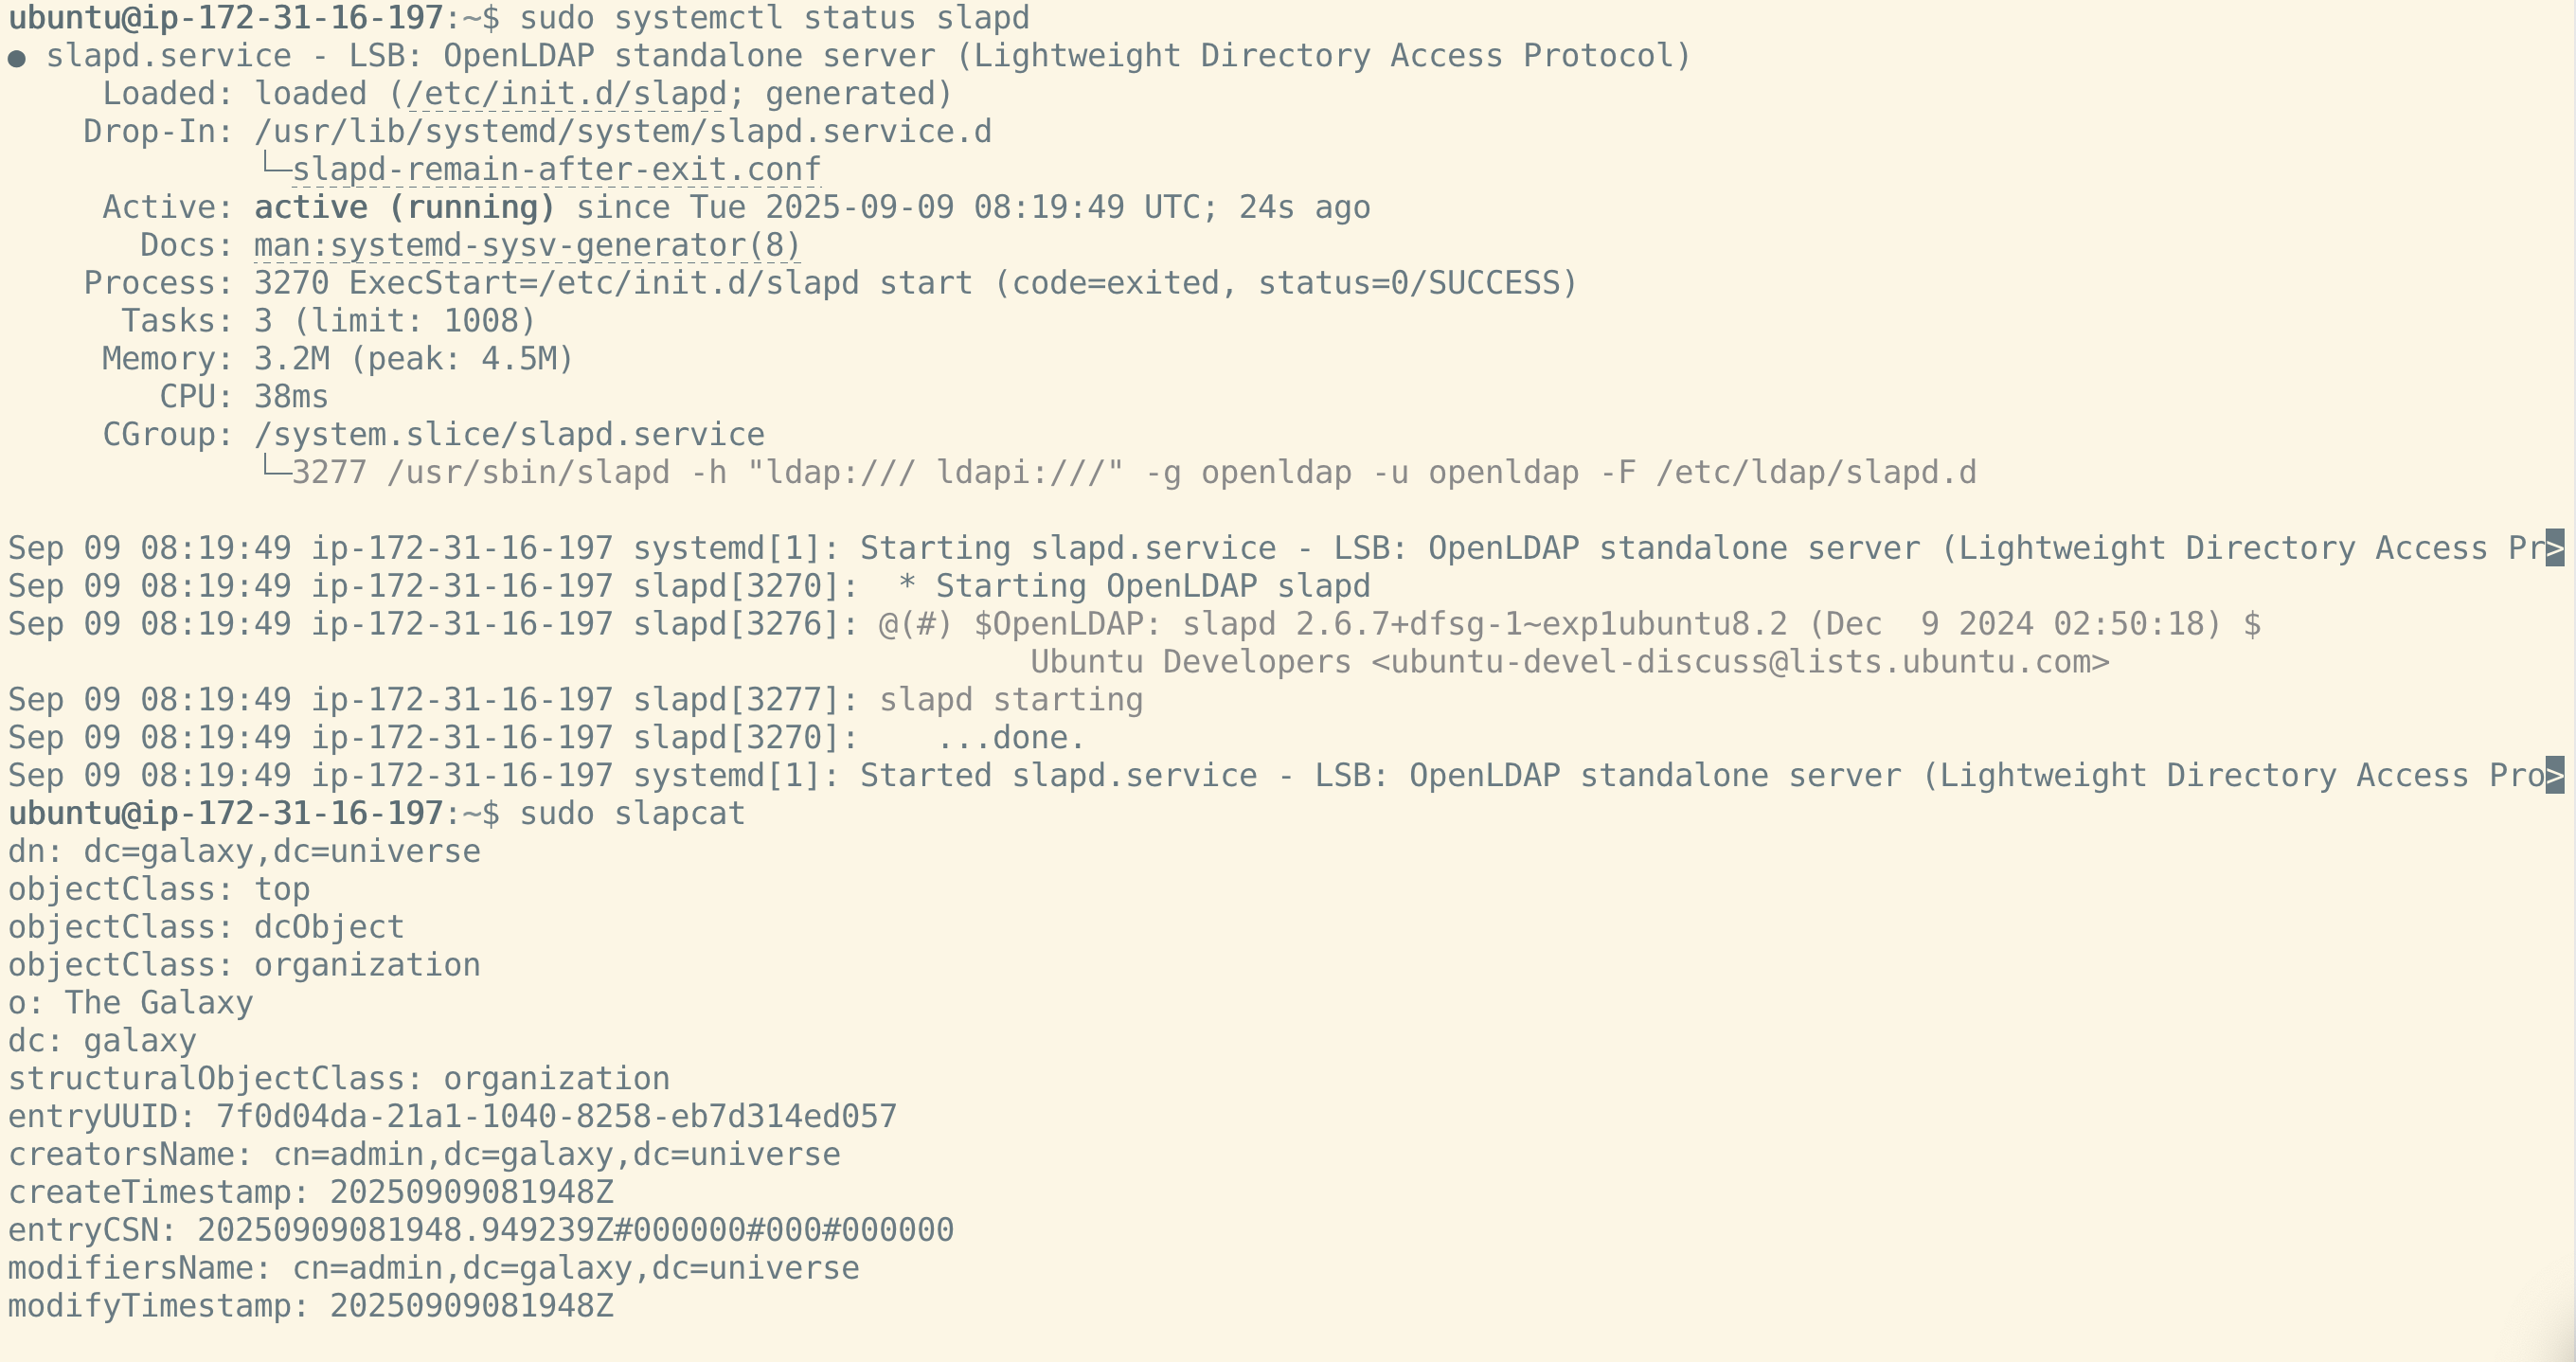
-
-
cn=config #
The next step is to update the password of the
cn=configuser. Remember to change line 5 and choose a strong password:sudo ldapmodify -Y EXTERNAL -H ldapi:/// <<EOF dn: olcDatabase={0}config,cn=config changetype: modify replace: olcRootPW olcRootPW: $(slappasswd -s "configpassword") EOF -
olcAccess #
Now we’ll apply some changes to the default config and security:
-
in OpenLDAP configuration, the DN
gidNumber=0+uidNumber=0,cn=peercred,cn=external,cn=authrepresents the local root user (typically UID/GID 0) authenticating via a secure Unix socket for administrative tasks, whilecn=configandcn=admin,dc=galaxy,dc=universeare built-in or custom admin DNs with full privileges over the config and MDB databases, respectively. The changes replace existing ACLs to strictly grant these users “manage” access (full read/write/control) to all attributes, denying everything to others for enhanced security, ensuring only trusted admins can modify server settings or data. -
Creates indexes on the attributes “mail”, “surname”, and “givenname”. This optimizes searches involving email addresses or names, reducing lookup times in large directories.
sudo ldapmodify -Y EXTERNAL -H ldapi:/// <<EOF dn: olcDatabase={0}config,cn=config changetype: modify replace: olcAccess olcAccess: {0}to * by dn.base="gidNumber=0+uidNumber=0,cn=peercred,cn=external,cn=auth" manage by dn.base="cn=config" manage by * none dn: olcDatabase={1}mdb,cn=config changetype: modify replace: olcAccess olcAccess: {0}to * by dn.base="gidNumber=0+uidNumber=0,cn=peercred,cn=external,cn=auth" manage by dn.base="cn=admin,dc=galaxy,dc=universe" manage by * none - add: olcDbIndex olcDbIndex: mail,surname,givenname eq,pres,sub EOF -
-
Securing OpenLDAP with LDAPS #
To encrypt communication with your LDAP server, you can enable LDAPS (LDAP over TLS) on port 1636.
-
Generate a Self-Signed Certificate:
sudo openssl req -x509 -nodes -days 3650 -newkey rsa:2048 \ -keyout /etc/ldap/sasl2/cert.key -out /etc/ldap/sasl2/cert.crt -
Configure
slapdfor LDAPS: Execute the following LDIF to load the certificate paths into the LDAP configuration.sudo chown -R openldap:openldap /etc/ldap/sasl2 sudo ldapmodify -Y EXTERNAL -H ldapi:/// <<EOF dn: cn=config changetype: modify replace: olcTLSCACertificateFile olcTLSCACertificateFile: /etc/ldap/sasl2/cert.crt - replace: olcTLSCertificateKeyFile olcTLSCertificateKeyFile: /etc/ldap/sasl2/cert.key - replace: olcTLSCertificateFile olcTLSCertificateFile: /etc/ldap/sasl2/cert.crt - replace: olcTLSVerifyClient olcTLSVerifyClient: never EOF -
Enable LDAPS Port: Edit the
slapdservice file to include the LDAPS URL.sudo nano /etc/default/slapdModify the SLAPD_SERVICES line:
SLAPD_SERVICES="ldap://:1389/ ldapi:/// ldaps://:1636/"Restart the service:
sudo systemctl restart slapd
-
Use the following command to open an SSH tunnel and get access to the LDAP or LDAPS port. This will avoid opening the ports on the AWS firewall:
ssh -f -N -L 1389:localhost:1389 ubuntu@myserverIP
ssh -f -N -L 1636:localhost:1636 ubuntu@myserverIP
Populating the OpenLDAP Directory #
With the server running, we will now load it with an organizational structure and user data.
Run the following command to download the LDIF files:
mkdir src/ldifs
curl -o ./src/ldifs/1.ou.ldif https://raw.githubusercontent.com/fabiograsso/okta-lab-ldap/refs/heads/main/src/ldifs-base/1.ou.ldif
curl -o ./src/ldifs/2.users.ldif https://raw.githubusercontent.com/fabiograsso/okta-lab-ldap/refs/heads/main/src/ldifs-base/2.users.ldif
curl -o ./src/ldifs/3.groups.ldif https://raw.githubusercontent.com/fabiograsso/okta-lab-ldap/refs/heads/main/src/ldifs-base/3.groups.ldif
curl -o ./src/ldifs/4.photos.ldif https://raw.githubusercontent.com/fabiograsso/okta-lab-ldap/refs/heads/main/src/ldifs-base/4.photos.ldif
curl -o ./src/ldifs/5.schema.ldif https://raw.githubusercontent.com/fabiograsso/okta-lab-ldap/refs/heads/main/src/ldifs/5.schema-nodocker.ldif
curl -o ./src/ldifs/6.updateusers.ldif https://raw.githubusercontent.com/fabiograsso/okta-lab-ldap/refs/heads/main/src/ldifs/6.updateusers.ldif
curl -o ./src/ldifs/7.addusers.ldif https://raw.githubusercontent.com/fabiograsso/okta-lab-ldap/refs/heads/main/src/ldifs/7.addusers.ldif
curl -o ./src/ldifs/8.new-ous.ldif https://raw.githubusercontent.com/fabiograsso/okta-lab-ldap/refs/heads/main/src/ldifs/8.new-ous.ldif
curl -o ./src/ldifs/9.change-ou.ldif https://raw.githubusercontent.com/fabiograsso/okta-lab-ldap/refs/heads/main/src/ldifs/9.change-ou.ldif
Loading the Data #
Use the ldapadd command to import the LDIF files into the LDAP Database:
sudo ldapadd -Y EXTERNAL -H ldapi:/// -f ./src/ldifs/1.ou.ldif
sudo ldapadd -Y EXTERNAL -H ldapi:/// -f ./src/ldifs/2.users.ldif
sudo ldapadd -Y EXTERNAL -H ldapi:/// -f ./src/ldifs/3.groups.ldif
sudo ldapadd -Y EXTERNAL -H ldapi:/// -f ./src/ldifs/4.photos.ldif
Verification #
Use ldapsearch to query the directory and confirm that the data was loaded correctly:
# Search for a specific user
sudo ldapsearch -Y EXTERNAL -H ldapi:/// -b "ou=People,dc=galaxy,dc=universe" "(uid=yoda)"

# Search for a specific group
sudo ldapsearch -Y EXTERNAL -H ldapi:/// -b "ou=Groups,dc=galaxy,dc=universe" "(cn=Jedi-Council)"
Install ldap-ui Management Interface #
1. Install Dependencies #
Install Python, pip, venv, and the necessary LDAP development headers and tools:
sudo apt-get install -y ldap-utils tox lcov valgrind libldap2-dev libsasl2-dev \
                        python3-dev python3-pip python3-venv python3-ldap
2. Create an Application User #
It’s best practice to run the web service under a dedicated, non-root user:
sudo useradd -r -s /bin/false ldap-ui3. Install ldap-ui
#
We will install the application in /opt/ldap-ui and create a Python virtual environment to isolate its dependencies:
sudo mkdir /opt/ldap-ui
sudo chown ldap-ui:ldap-ui /opt/ldap-ui
sudo -u ldap-ui python3 -m venv /opt/ldap-ui/.venv3
sudo -u ldap-ui /opt/ldap-ui/.venv3/bin/pip install ldap-ui
4. Create a systemd Service #
To ensure the service starts automatically and runs in the background, create a systemd service file:
sudo nano /etc/systemd/system/ldap-ui.servicePaste the following content into the file. This service runs the process as the ldap-ui user:
[Unit]
Description=ldap-ui - Lightweight LDAP Web UI
After=network.target auditd.service slapd.service
BindsTo=slapd.service

[Service]
# Environment variables for ldap-ui
Environment="BASE_DN=dc=galaxy,dc=universe"
Environment="LDAP_URL=ldap://127.0.0.1"
Environment="LOGIN_ATTR=uid"
Environment="BIND_PATTERN=cn=%%s,dc=galaxy,dc=universe"

WorkingDirectory=/opt/ldap-ui
ExecStart=/opt/ldap-ui/.venv3/bin/ldap-ui
Type=simple
User=ldap-ui
Group=ldap-ui
Restart=always

# Security Hardening
ProtectHome=true
ProtectSystem=strict
SystemCallFilter=@system-service
NoNewPrivileges=true

[Install]
WantedBy=multi-user.target
5. Start and Enable the Service #
sudo systemctl daemon-reload
sudo systemctl enable --now ldap-ui.service
sudo systemctl status ldap-ui.service
The ldap-ui service is now running and listening on port 5000 (http://<your_server_ip>:5000).
6. Access the ldap-ui interface #
Since there is no specific security, I warmly suggest:
-
Publish it using a reverse proxy (i.e., nginx), or
-
Create an SSH tunnel and then open the web portal from your PC instead of exposing port 5000 of the server
ssh -f -N -L 5000:localhost:5000 ubuntu@myopenldapserver
You can log in using “admin” as username and the cn=admin password.
More information about ldap-ui can be found in dnknth/ldap-ui Github repository.
Integrating with Okta via the LDAP Agent #
Once the directory is up and running, the next step is to install and configure the Okta LDAP Agent.
In a real environment, the Agent is normally installed on a dedicated server, different from the LDAP server. In this case, since we are just creating a demo/test environment, we will install everything on the same server.
Installing the Okta LDAP Agent #
- Log in to your Okta Admin Console.
- Navigate to Directory → Directory Integrations.
- Click Add Directory → Add LDAP Directory.
- Follow the setup steps. On the “Install Agent” step, right-click the Download Agent button and copy the link.
- Download the
.debfile on your LDAP server (e.g., usingwget https://....). - Install the Agent using dpkg:
sudo dpkg -i OktaLDAPAgent-*.debAdd the TLS Certificate #
Since the certificate is self-signed, we need to import it into the Okta Agent’s Java environment in order to make it trusted:
/opt/Okta/OktaLDAPAgent/jre/bin/keytool -importcert \
-alias openldap \
-file /etc/ldap/sasl2/cert.crt \
-cacerts \
-storepass changeit \
-noprompt
Configuring the Agent #
The agent requires an interactive setup to register with your Okta org.
-
Run the Configuration Script:
sudo /opt/Okta/OktaLDAPAgent/scripts/configure_agent.sh -
Follow the Prompts. The script will guide you through the setup process:
- Okta Subdomain: Enter your Okta org URL (e.g.,
https://myorg.okta.com). - Proxy Server: Press Enter to skip.
- LDAP Server:
ldaps://localhost:1636 - LDAP Admin DN for Agent: For testing, you can use the main admin account:
cn=admin,dc=galaxy,dc=universe. For production, see the considerations in the next section. - LDAP Admin Password: Enter the password for the account above.
- Register Agent in Okta:
- You will see a prompt like this:
To continue, navigate to the following website: [https://xxx.okta.com/activate] and enter the following code: [MSJPKGRP]- Follow the instructions and open the
/activateURL in your Okta tenant - Enter the Activation code
- Click on “Allow”
- Okta Subdomain: Enter your Okta org URL (e.g.,
-
Once the configuration is complete, the script will start the agent service. You can verify its status:
sudo systemctl status OktaLDAPAgent
Once the OpenLDAP server is installed, and the agent is configured, continue with Using Management Interfaces and Managing the Okta-LDAP Integration.
Fully Automated One-click Installation Script #
This script automates the entire native installation process described in the Manual Installation section.
To use it, start from a brand new Ubuntu 24.04 LTS server and execute the following commands.
-
Clone the repository
apt-get install -y git # if git is not yet installed
git clone https://github.com/fabiograsso/okta-lab-ldap/
cd okta-lab-ldap
The script will download the LDIF files. If you prefer to load your own data, you can change the source file and use your own LDIF files.
-
Edit the
.envfile to change theOKTA_ORG,LDAP_ADMIN_PASSWORD, andLDAP_CONFIG_PASSWORDvariables.cp .env.sample .env nano .env # or vi .env -
Download the
.debfile of the Okta LDAP Agent and copy it into theokta-agentfolder.- Log in to your Okta Admin Console.
- Navigate to Directory → Directory Integrations.
- Click Add Directory → Add LDAP Directory.
- Follow the setup steps. On the “Install Agent” step, right-click the Download Agent button and copy the link.
- Download the
.debfile in the folderokta-agentof your LDAP server (e.g., usingwget https://....).
curl -o ./okta-agent/OktaLDAPAgent.deb \
https://xxx.okta.com/artifacts/JAVA_LDAP/05.24.00/OktaLDAPAgent-05.24.00-27823a892f7b.x86_64.deb
Before running the final command, double-check to:
- Have downloaded the Okta LDAP Agent deb file in the folder
okta-agent - Have edited the
.envfile and customized theOKTA_ORG,LDAP_ADMIN_PASSWORD, andLDAP_CONFIG_PASSWORDvariables - You’re using a brand new/clean Ubuntu installation. The script is built to run ONLY in a clean environment!
-
Then, execute the following commands:
sudo bash ./scripts/oneclickinstall.shOr, if you want to skip the confirmation, you can run it in silent mode:
sudo bash ./scripts/oneclickinstall.sh -s -
When finished, you can run the LDAP Agent setup:
sudo /opt/Okta/OktaLDAPAgent/scripts/configure_agent.shFollow the same prompts as described in the Manual Installation section.
-
Optionally, you can delete the GitHub cloned folder:
 ```bash
 cd ..
 sudo rm -rf okta-lab-ldap
 ```
- LDAP: Available on
1389and1636. - ldap-ui: Available at
5000.
Use the following command to open an SSH tunnel and get access to the LDAP, LDAPS, and ldap-ui ports. This will avoid opening the ports on the AWS firewall:
ssh -f -N -L 1389:localhost:1389 ubuntu@myserverIP
ssh -f -N -L 1636:localhost:1636 ubuntu@myserverIP
ssh -f -N -L 5000:localhost:5000 ubuntu@myserverIP
Once the OpenLDAP server is installed, and the agent is configured, continue with Using Management Interfaces and Managing the Okta-LDAP Integration.
Appendix A: Documentation #
- fabiograsso/okta-lab-ldap repository
- OpenLDAP Administrator’s Guide
- ldap-ui GitHub Repository
- Apache Directory Studio Documentation
- Okta LDAP Agent Documentation
- Ubuntu Server Guide
Appendix B: Notes on Docker and Docker-compose #
Update LDAP Agent version #
To update the LDAP agent, just delete the old .deb file and replace it with the new one. Then rebuild the image with make build
Appendix C: Production Considerations for the Okta LDAP Agent #
When deploying in a production environment, consider the following best practices:
-
Use a Dedicated Service Account - Instead of using the master
cn=adminaccount, it is highly recommended to create a dedicated service account for the Okta agent. This account needs read and write permissions to support provisioning users from Okta to LDAP. You would grant specific permissions (ACLs) to this account to limit its access to only what is necessary. -
High Availability - For redundancy and failover, always deploy at least two Okta LDAP agents on separate servers, both pointing to the same LDAP directory. Okta will automatically round-robin requests between them and fail over if one agent becomes unavailable.
-
Auto-Update - The Okta LDAP agent can update itself automatically. This feature requires at least two agents to be installed to ensure zero downtime during the update process. See Automatically update Okta LDAP agents.
-
Performance Tuning - The agent’s performance can be tuned by editing its configuration file at
/opt/Okta/OktaLDAPAgent/conf/OktaLDAPAgent.conf. In particular, thepollingThreadCountproperty controls the number of threads used for polling. Increasing this value can improve performance on very busy directories (remember to changemaxConnectionsPerHostaccordingly). For more details and other parameters, you can refer to the Documentation LDAP configuration parameters and Change the number of Okta LDAP agent threads. -
Logging and Verbosity - Agent logs are located at
/opt/Okta/OktaLDAPAgent/logs/agent.log. To debug issues, you can increase the logging verbosity toDEBUGby editing the/opt/Okta/OktaLDAPAgent/conf/logback.xmlfile. See Locate the Okta LDAP agent log.
Conclusion #
This comprehensive guide has walked you through deploying OpenLDAP on Ubuntu 24.04 LTS with complete Okta integration. Whether you chose the manual installation for learning purposes, the one-click script for rapid deployment, or the Docker approach for development environments, you now have a fully functional LDAP directory integrated with Okta.
The integration provides powerful capabilities including delegated authentication, user provisioning, custom attribute mapping, and organizational unit management. This setup serves as an excellent foundation for understanding enterprise directory services and their integration with modern identity providers.

Remember that while this guide provides a solid foundation for testing and development, production deployments require additional considerations around security, high availability, monitoring, and compliance with your organization’s policies.
Questions or feedback? Feel free to reach out or contribute to the fabiograsso/okta-lab-ldap repository.